
Hi everyone :)
I recently ran out of Agrax Earthshade and found myself critically low on Nuln Oil and, after an appropriate amount of wailing and gnashing of teeth, I decided that rather than replenish my supplies I'd have a go at making replacements myself. Over the last few weeks I've done some research into suggested approaches and conducted some small scale experiments, but this is my first go at making large batch washes. I thought I'd share with you my process and the outcome.

Method
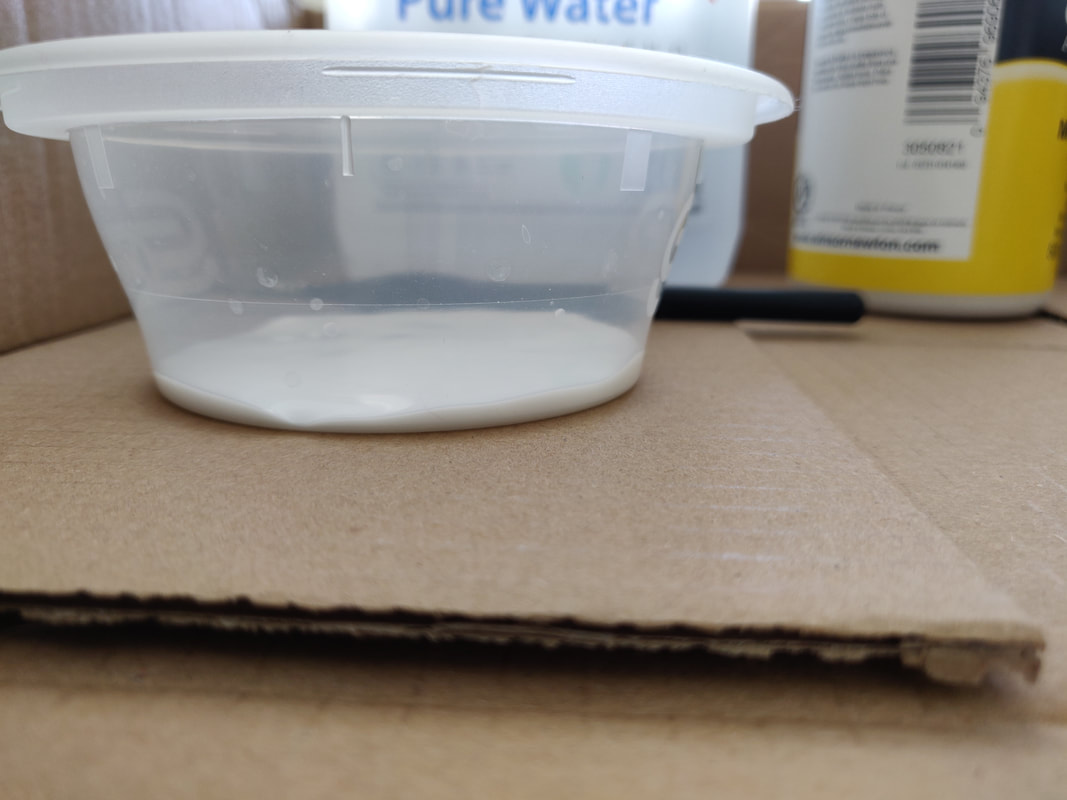
The method for making the washes is actually pretty simple, although it will require a little trial and error to get it perfect. The base for each is 1 part acrylic matt medium to 3 parts distilled/de-ionised water. You're looking for about the consistency of a branded wash, without the colour of course! As I was making a larger batch, I added a single drop of washing up liquid to each pot to act as flow aid. This isn't technically necessary but does help the consistency and how it works on the miniature.
If you're making smaller batches of wash you can put a few drops of washing up liquid into a dropper bottle with some of the distilled water and add to your washes from there. That helps you regulate the amount of washing up liquid because you really do only need a tiny amount.
Once you've got the base for the wash it's time to add the colour. Unfortunately this is where trial and error can't really be avoided, as the type of colour (paint or ink) and the level of pigment it contains will affect this. One thing to note is that black ink will essentially always require less colour due to the nature of the pigments.
This is one place I would recommend varying from my method, and a way in which I will do things differently next time. The paints did work as a way of colouring the washes, but were not as good as using inks. The brown in particular, which I picked up because it was cheaper and I intended to use it in large batches, required a lot to be added to produce the colour I wanted and that really started to change the consistency of the wash.

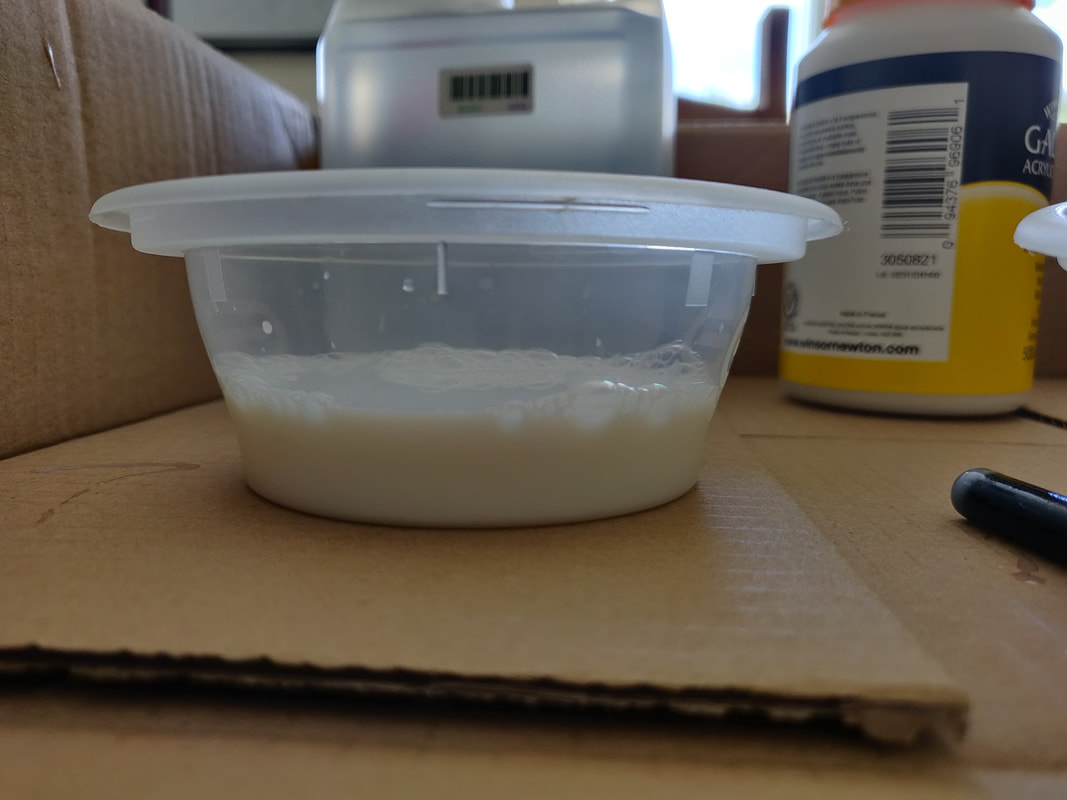
Using this method you do end up with a very slight milkiness to the wash, but it dries clear so it's not something you have to worry about!
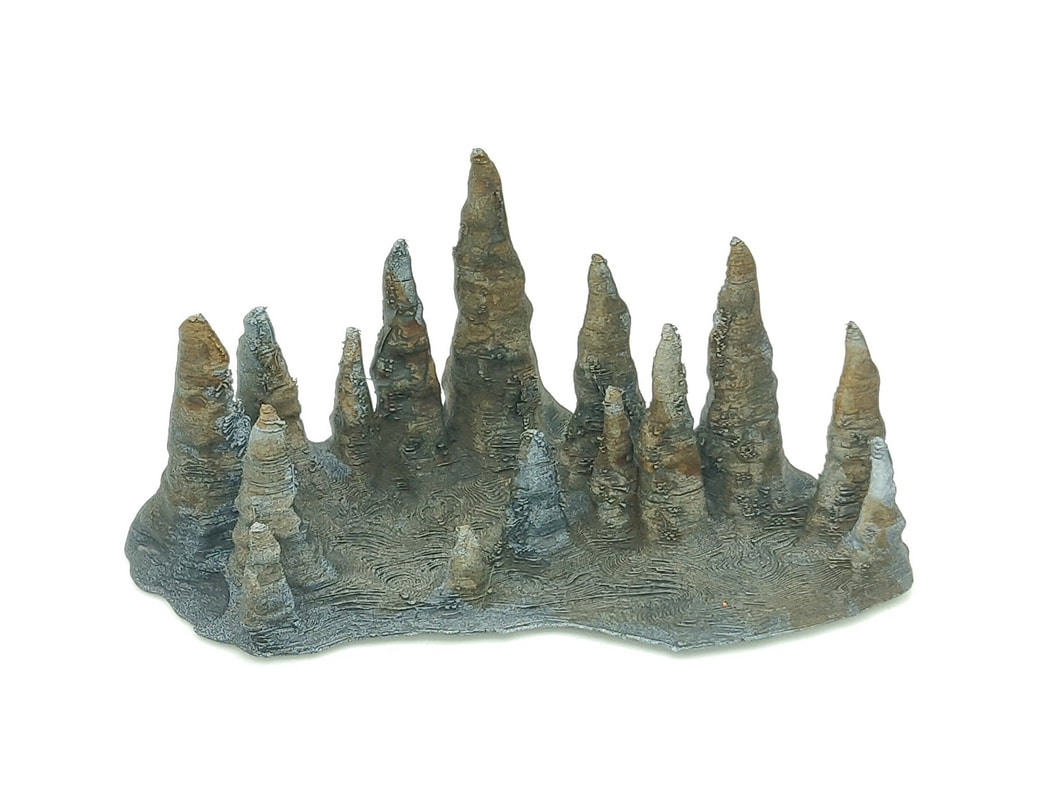
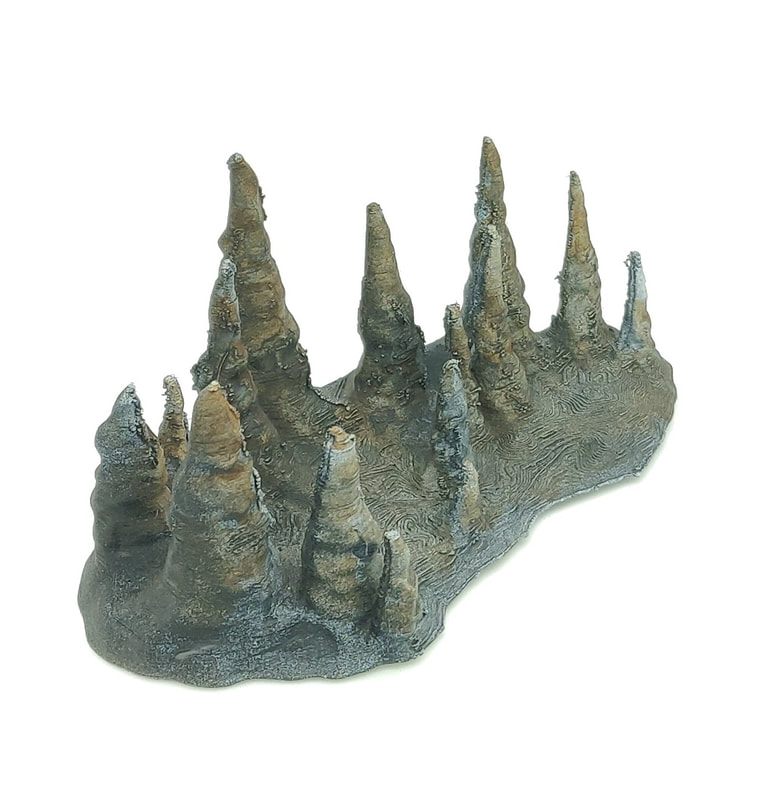
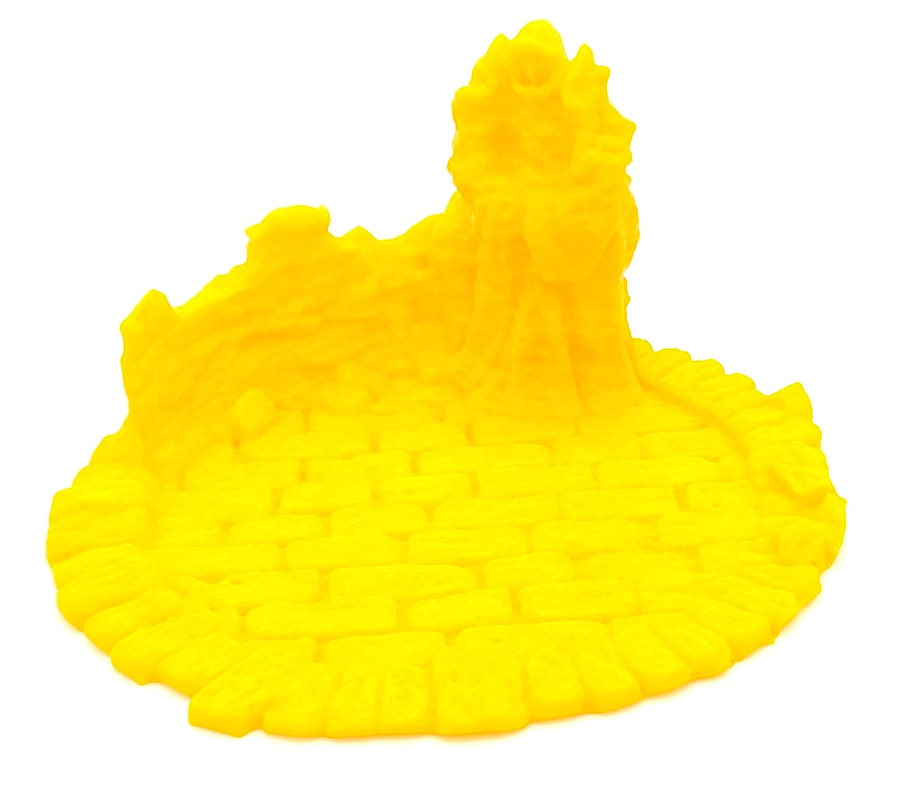
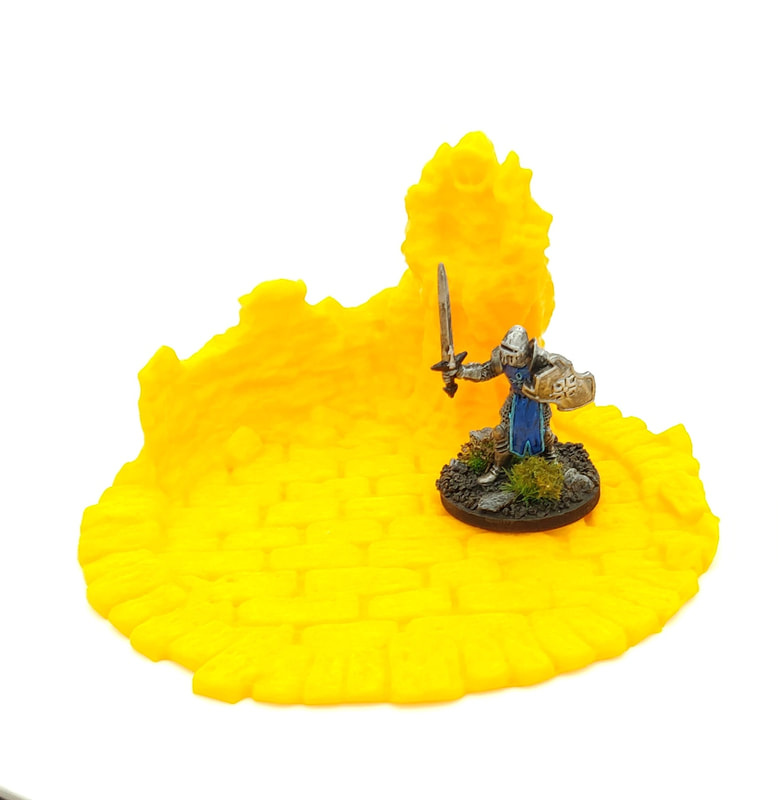
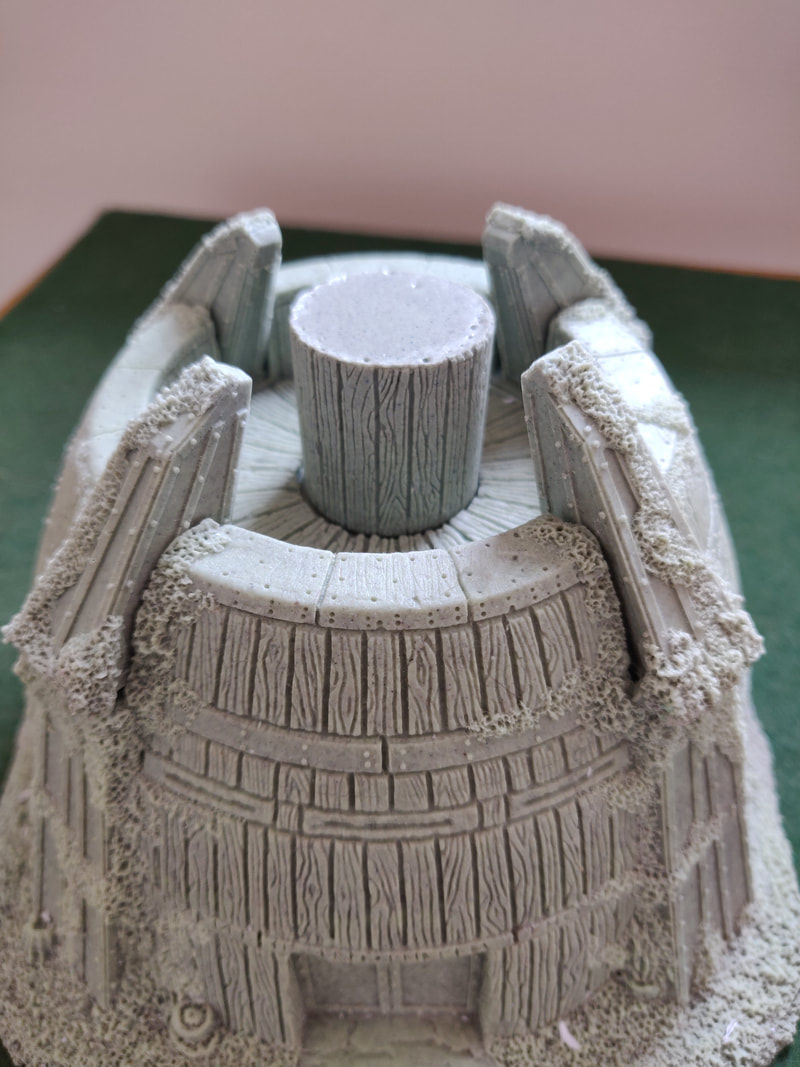
I have found that the best way to test the colour and consistency of the washes is to try them out on a miniature. If you still have some of your preferred branded wash available it's a good idea to try them out next to each other so you can get a clear idea of how similar they are. Don't be afraid to add more of anything at this stage if it's not quite what you were hoping for. I tested my washes on an old 3D print of some stalagmites. Here you can see the piece which I painted using only zenithal priming and the washes I had made.
Final Thoughts
I mentioned above that part of the point of me making these was to save some money. Buying all the ingredients for these isn't necessarily cheap in itself - I spent about £15 - but what I have here will keep me making my own washes for a very long time. In the long run it will definitely prove to be a good investment. I'm also going to be looking in to getting some different inks so that I can make washes of lots of different colours!
I've included some amazon links here (they're actually affiliate links so I would get a tiny amount if you bought something using the links, at no extra cost to you). They're here to make things easier if you want to see what's out there and check out prices. I have no particular attachment to those items other than I've used them and they've worked well. I hope it goes without saying that I don't guarantee anything regarding them! Finally, old takeaway pots work really well for this, but if you use them don't make the mistake of trying to mix the wash by shaking the pot. At least the pots I used were not waterproof and made for a very messy time! I really hope you've found this interesting and helpful, and that you have fun if you decide to make your own washes. Let me know how you get on! Goblin Squire :)
0 Comments
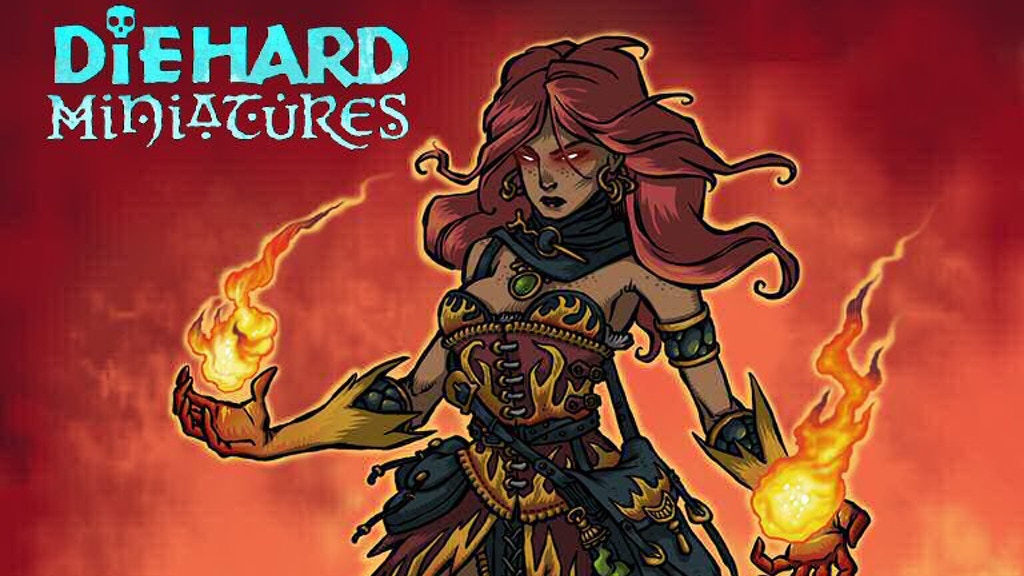
Image copyright Diehard Miniatures.
Hi everyone :)
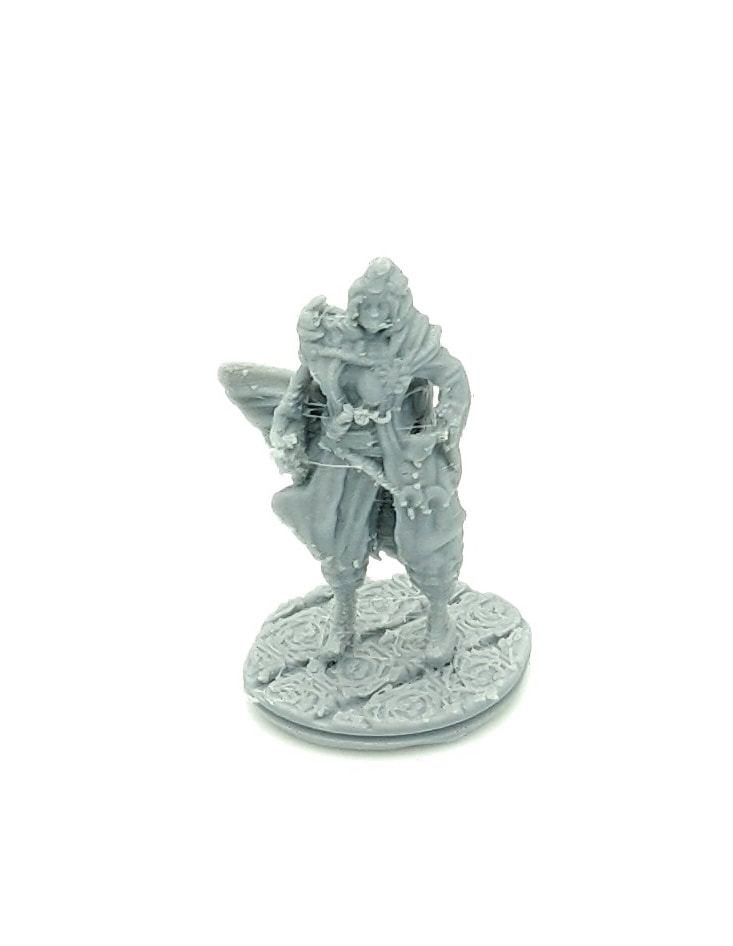
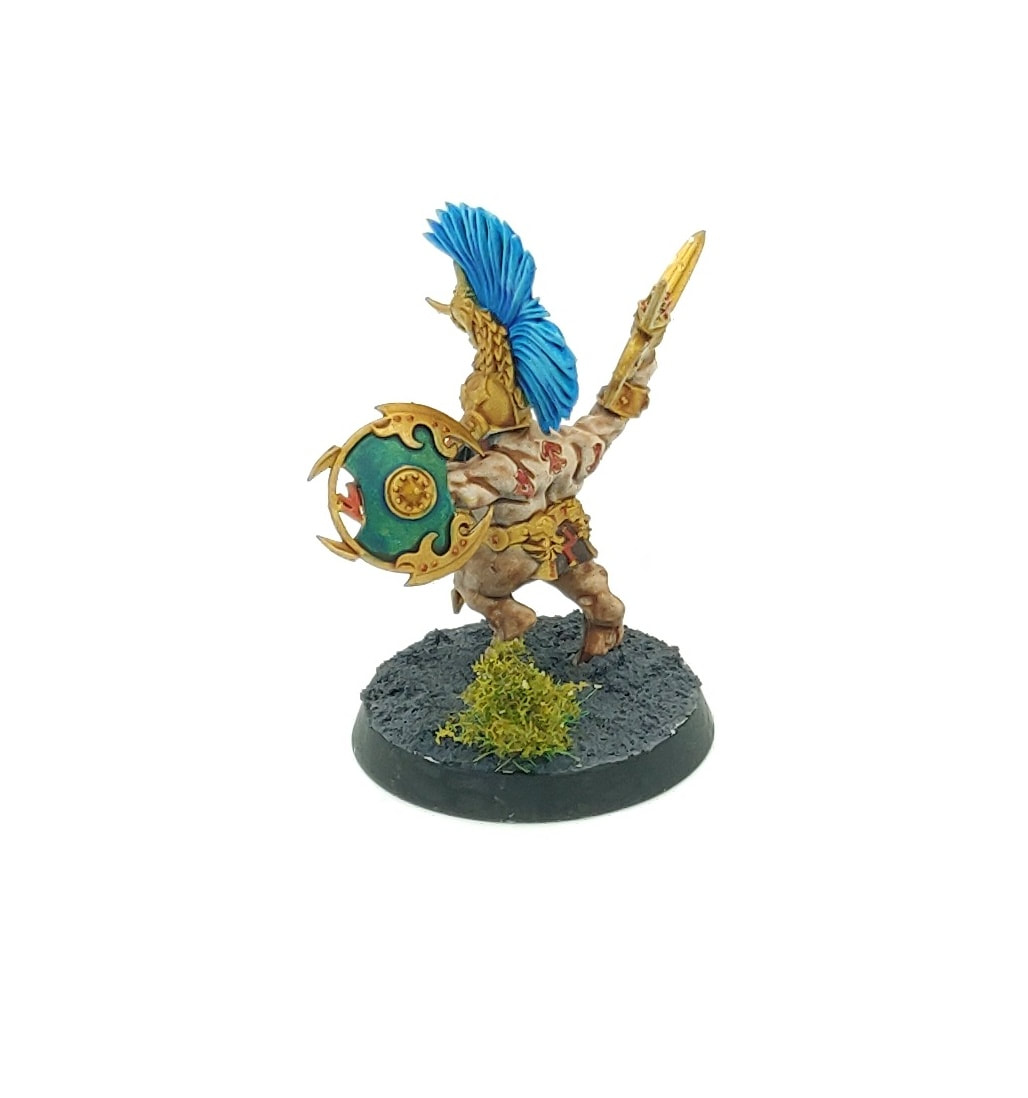
Today I'm going to have a look at another small miniature creator in the UK - Diehard Miniatures. I recently received a mini from a kickstarter they did, and they've recently launched another kickstarter project, so I'll have a look at those. Diehard look to 'bring Oldhammer into the now', and that's reflected in the designs and sculpts. The kickstarter I backed was 'Chaos Incursion', and the miniatures here certainly live up to the idea of recreating old warhammer. This project had a feel of 1990s chaos to me, and I've mentioned before that I like miniatures which combine modern methods and standards with an old-school feel. Unfortunately I was only able to back for a single miniature due to financial constraints, and I chose Helgan Half-Snake, Chaos General. Here's the concept art from the kickstarter page. 
Image copyright Diehard Miniatures
I really loved this concept art, so it is the miniature I was drawn to and ended up backing for. It's always a slight gamble backing a miniature without seeing the sculpt, but I was really pleased with how it was translated into metal.
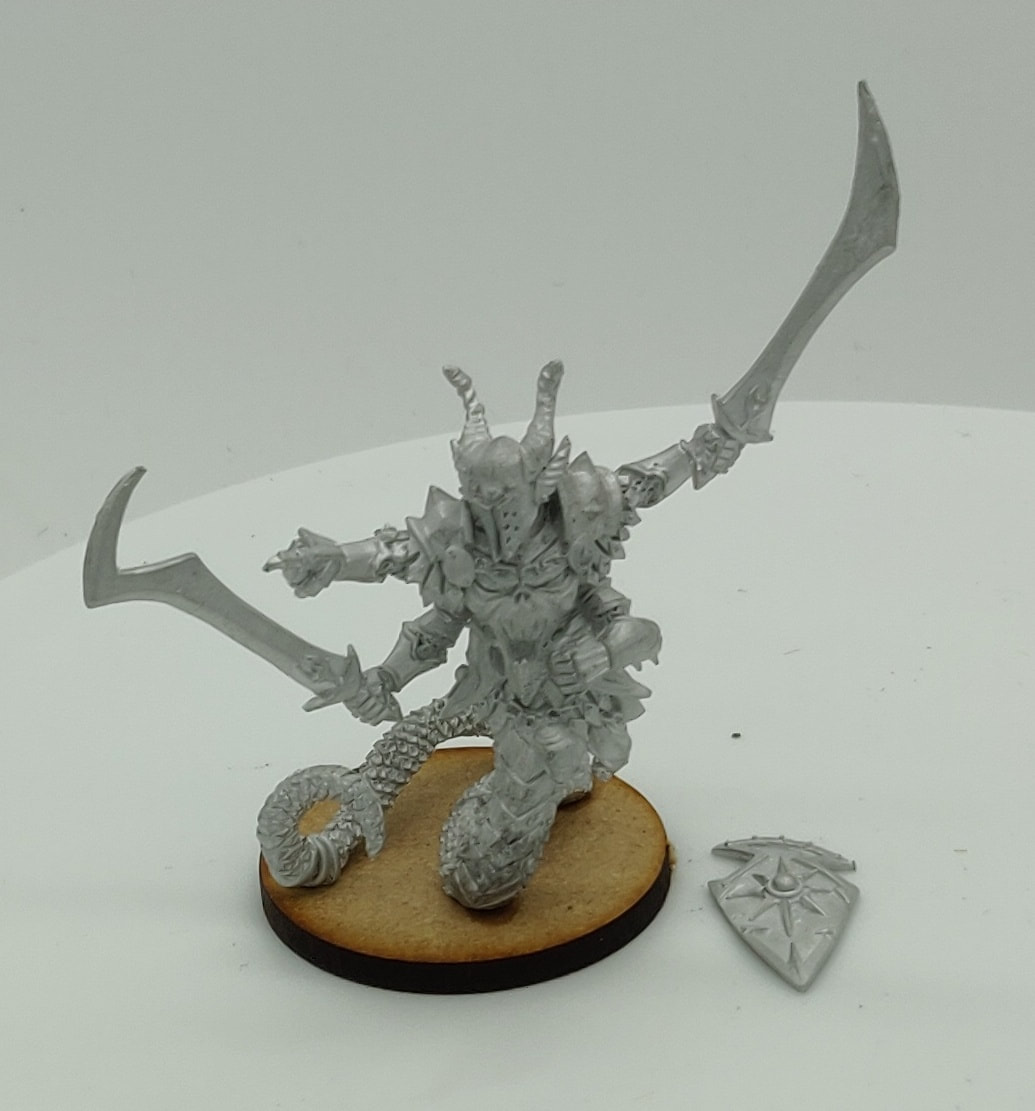
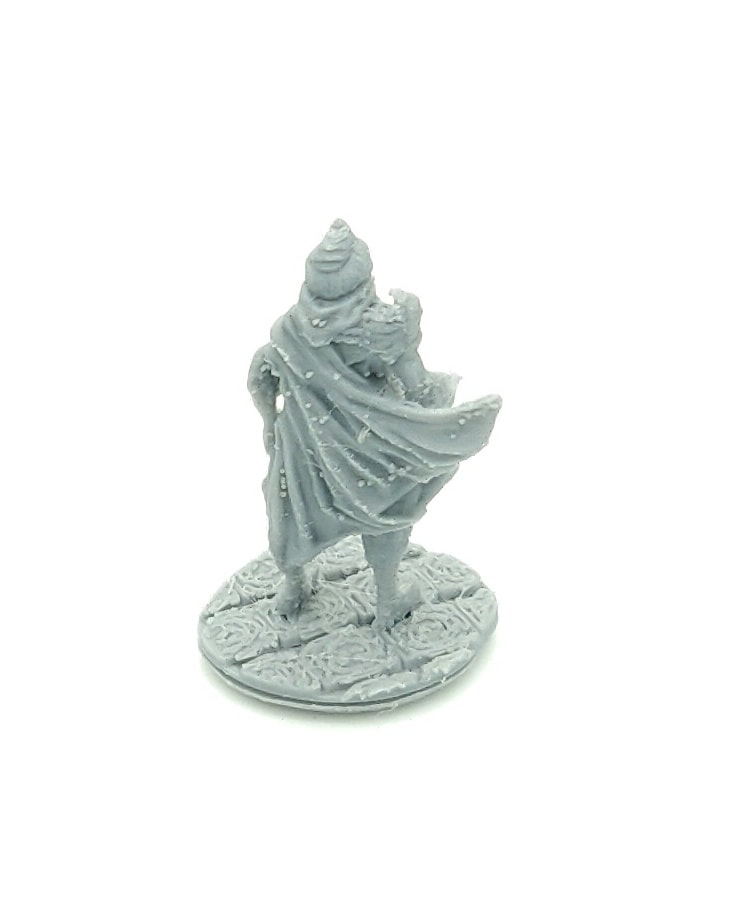
The miniature which arrived had a fairly heavy covering of flashing (first picture), but it only took about 15 minutes to remove it. Once that was done the miniature was looking really good and I'm looking forward to getting some paint on it (second picture). The miniature itself came in 4 pieces (including the shield which I'll attach after painting). There are some very slight gaps where the pieces attached which I'll fill, although they're small enough that I think you could get away without filling them,
The amount and clarity of the detail is really good, right in that sweet spot of plenty for a dynamic miniature without making it a nightmare to paint! The only thing to note is that he didn't come with a base, so I've used an MDF one I had in my bits box here.
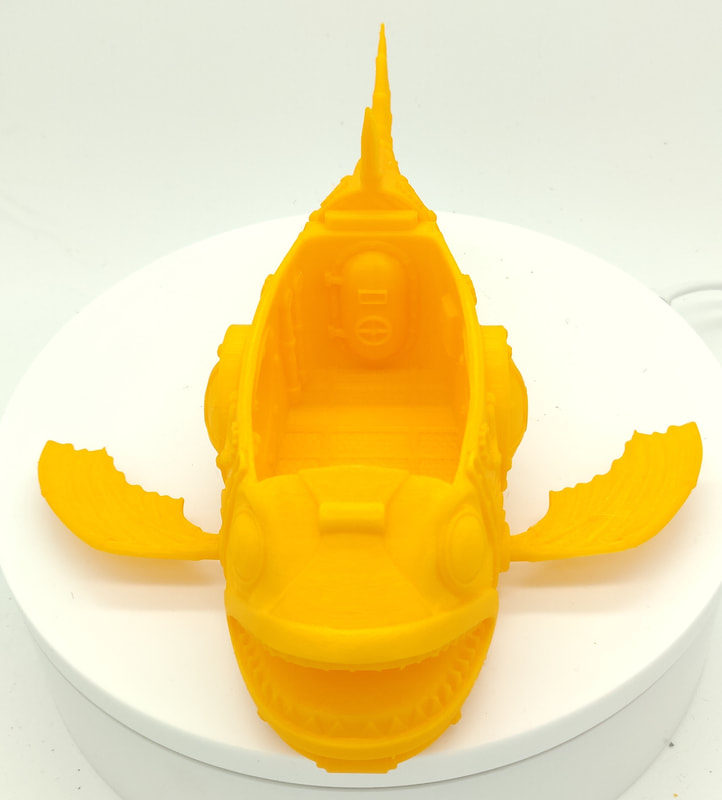
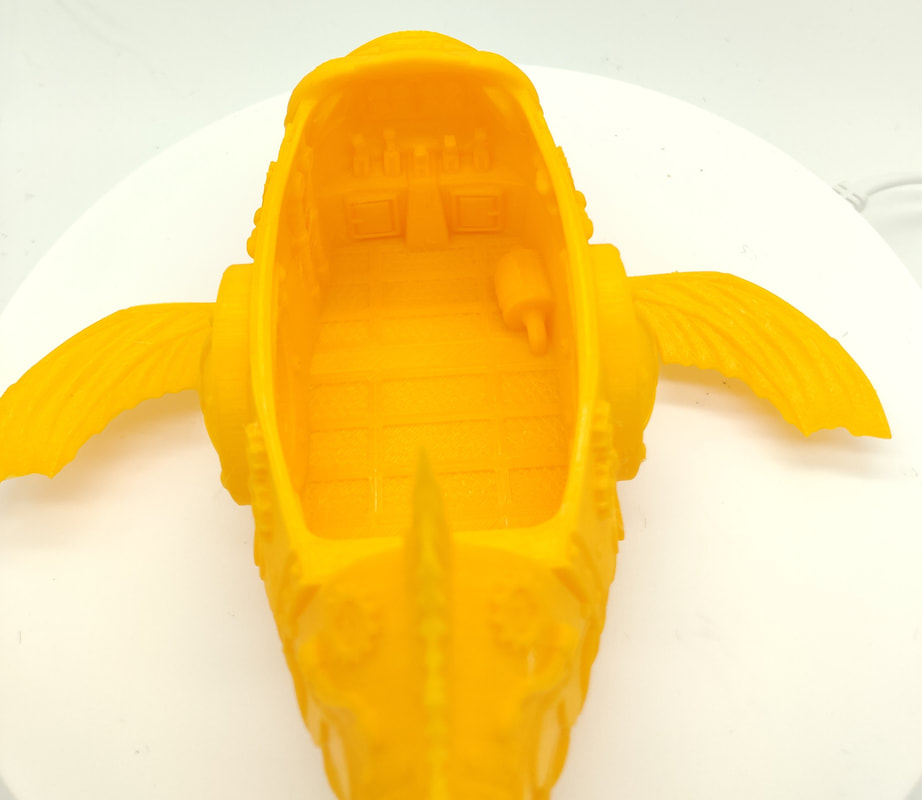
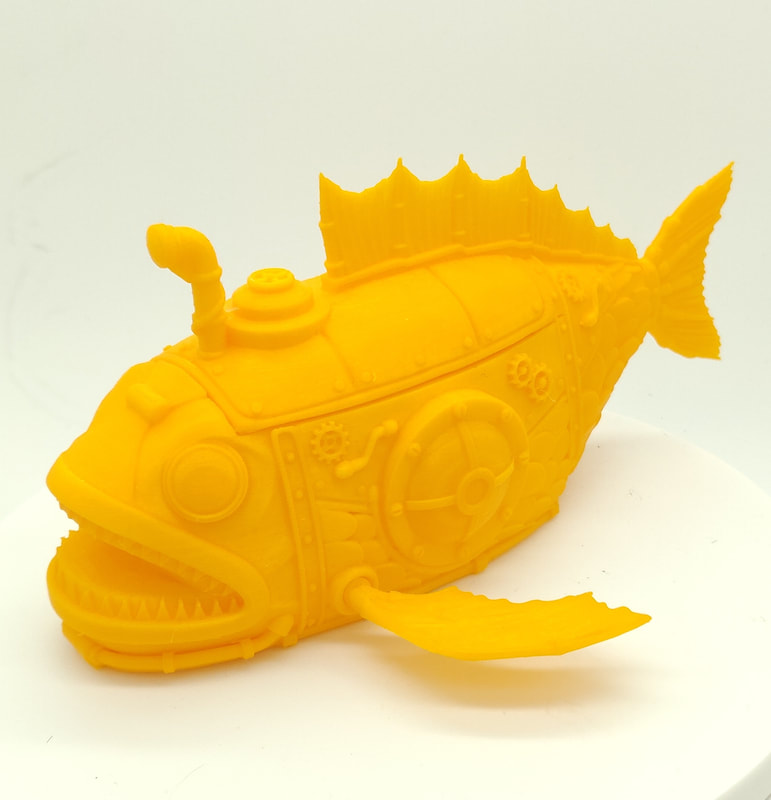
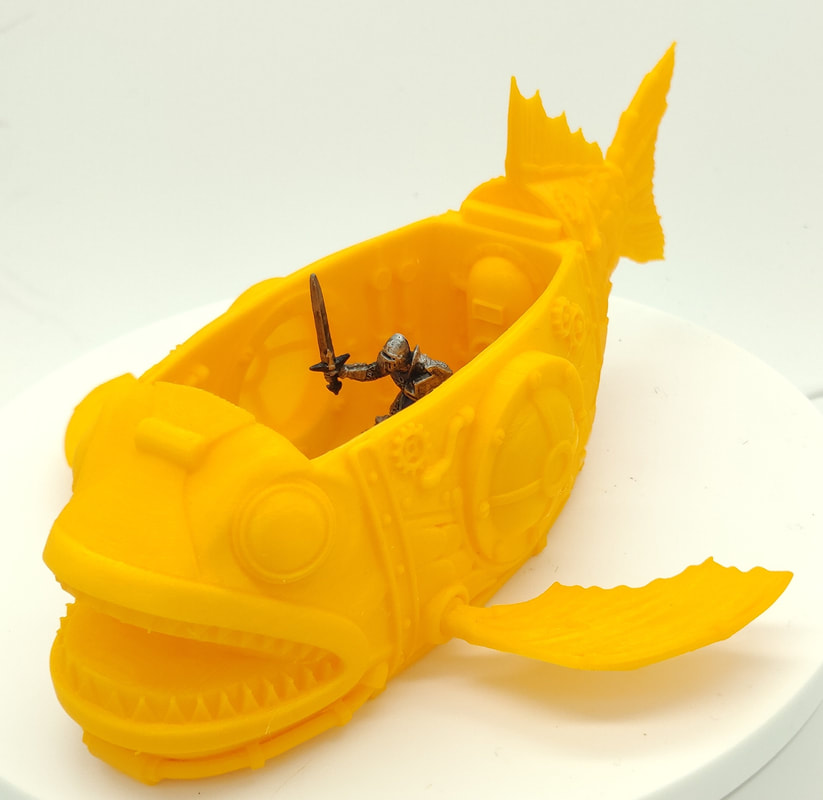
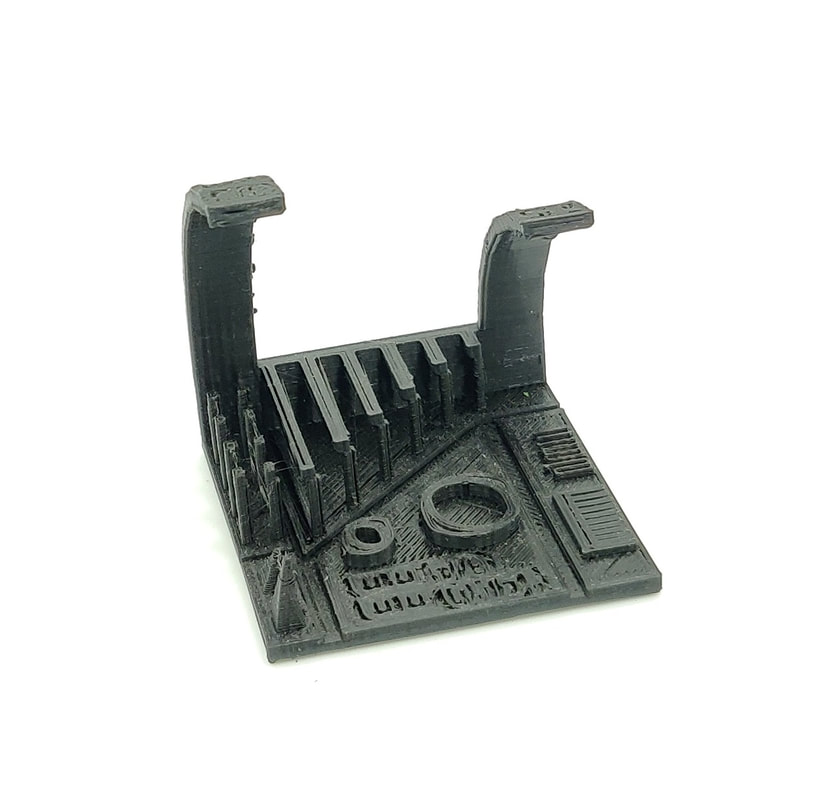
This miniature isn't on the Diehard website just yet (although there are many minis that are), but never fear - there is another kickstarter going on right now! The theme of the current project is 'Wizards and their magics' and there are eight wizards and seven familiars unlocked. There are some really interesting designs on there, from human to arcane creatures, so I'd recommend heading over there and having a look. Pledges start from just £6. https://www.kickstarter.com/projects/diehardminiatures/diehard-miniatures-wizards-and-their-magics Goblin Squire :) Hi everyone :) In my last blog post I wrote about some of the challenges of 3D printing, and the level of perseverance which can be required to get good prints. Today I thought I would show one of my recent prints to show that it’s not all challenges and frustrations! This piece is the Gnomish Submarine designed by EC3D. 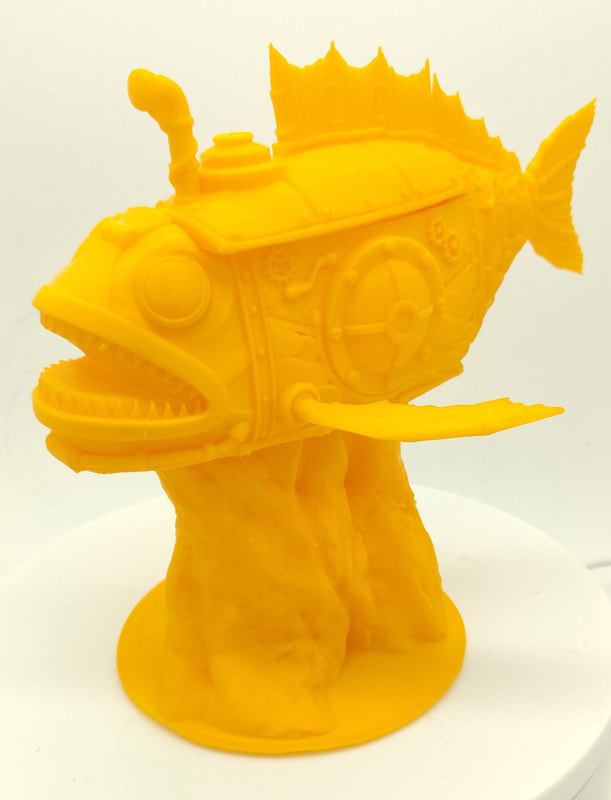 It’s not possible to get good prints with bad printer settings, but a good design is also crucial. As with all forms of art, I guess, good execution can only get you so far, and a perfect print of a bad design will still be lacking. I really like the designs by EC3D - the level of detail both inside and out the submarine is fantastic, and it’s really indicative of the full catalogue of designs. In fact, I like the designs so much I’ve licensed them so that I can sell the prints! If you’re interested in the submarine it is £45 without the base or £65 with the base (unpainted). Printed and painted by me it would be £100 without the base or £150 with (all prices exclude shipping). Remember, you get 10% off all my prices if you support me on patreon for $5+ a month. A large selection of prints can be found on my 3D printing page.
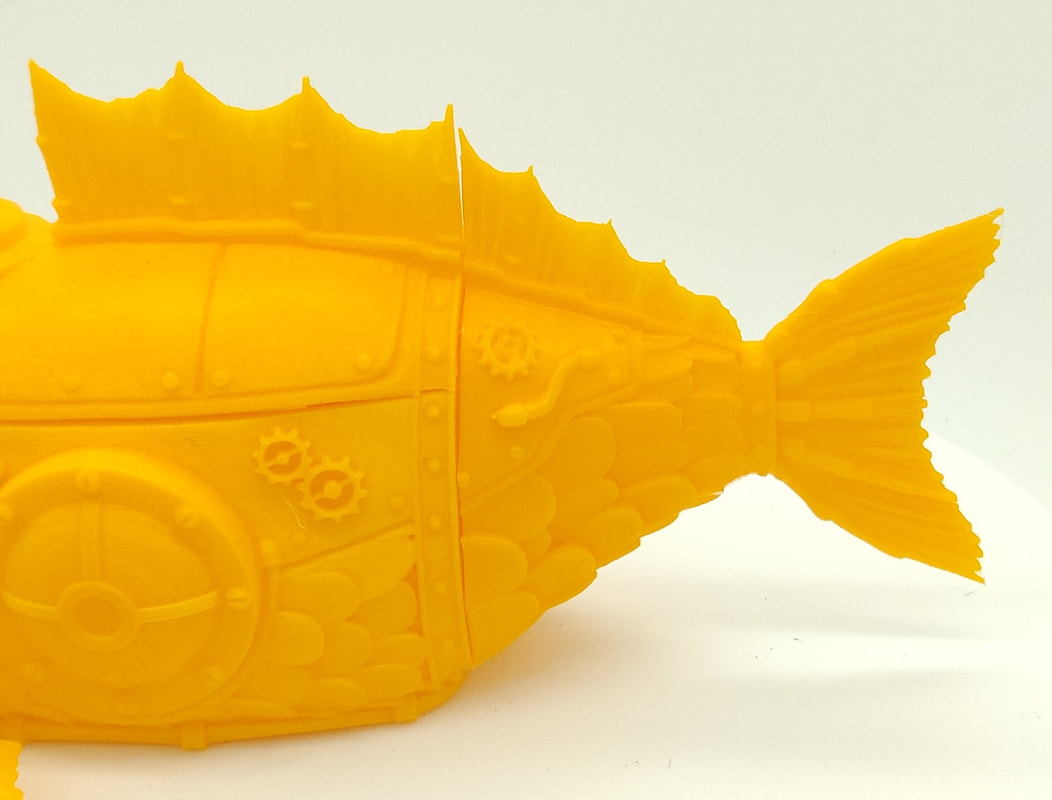 This print hasn’t been cleaned or tidied up at all, and the level of detail you can see is really great. There are one or two areas where there is very slight banding, but realistically that won’t be visible once the submarine is painted. FDM printed pieces like this are a great option for terrain and larger miniatures for the tabletop. I’m now thinking about ways I can gently encourage the players in one of my D&D campaigns to head to the coast so that I can use this beauty!
Hi everyone :)
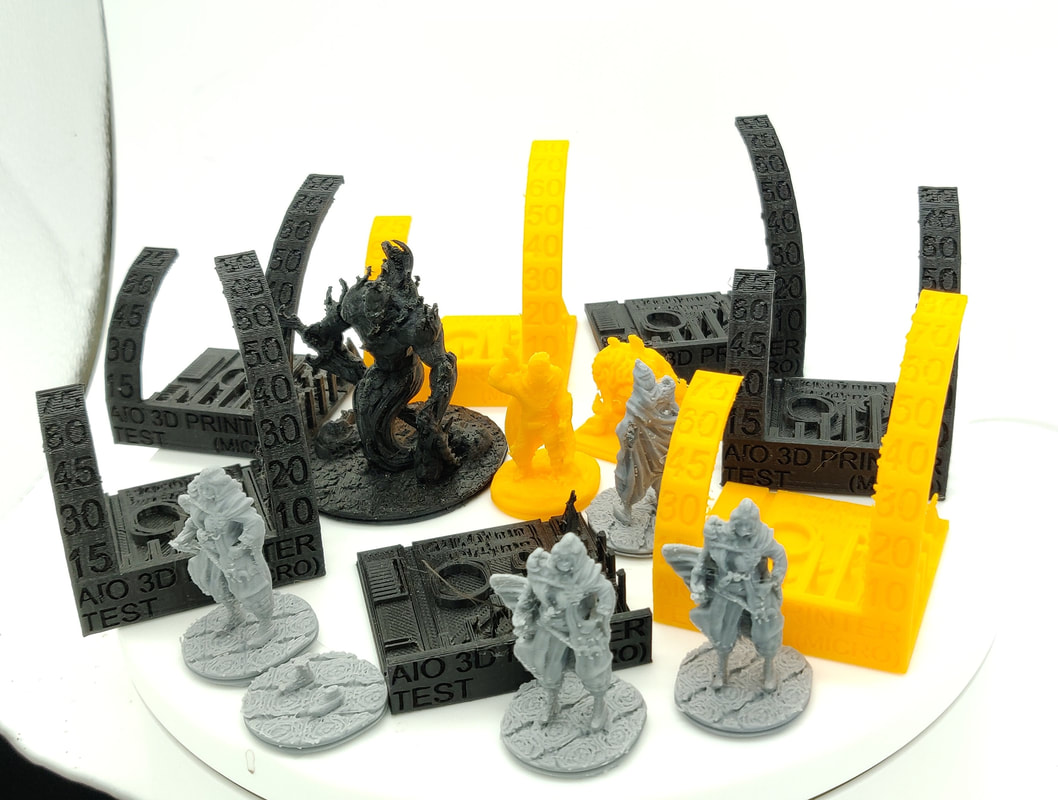
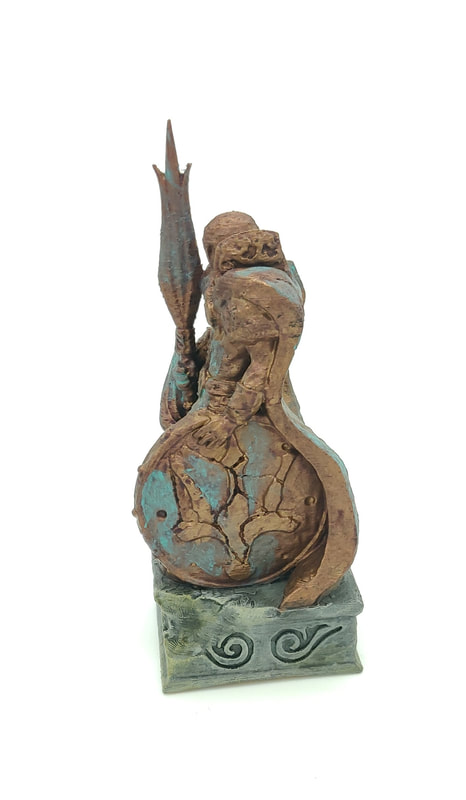
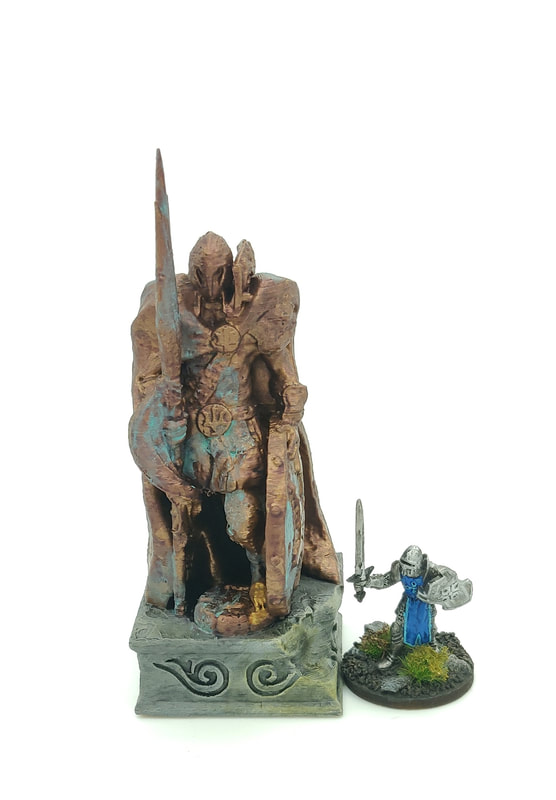
I'm going to be writing a few blog posts over the next few weeks focussing on 3D printing for hobbying, and for this first one I wanted to avoid too much technical talk, and instead focus on some of the challenges and opportunities of 3D printing and the mentality you need for it. I know that sounds odd at this point, but I hope that it will make sense by the end! First a very quick plug - I am licensed to sell a variety of 3D prints, both painted and unpainted. I charge £1 per printing hour (with 10% off for patrons at $5+ per month) and this is significantly less that many places you can find online. You can check out what I can offer on my 3D printing page. I've had the printer for some months now, and am happy with the prints I am getting at this point. Here's a statue I printed and painted this week - it's a tarnished copper statue, with a shiny foot where people have touched it.
I have an FDM printer (Fused Deposition Modeling) - in basic terms that means it melts the plastic and extrudes it from the nozzle in a set pattern. It builds from the bottom up, adding layer after layer until you have the finished article. Without the right settings, there are a multitude of things which can go wrong. The layers may not stick to each other, the different layers may be very obvious, there could be too much or too little plastic. Lots to get your head around.
Things get more complicated when you add the fact that there isn't a single 'correct' suite of settings, and that the optimal settings can vary depending on things like the make of plastic, the temperature of the room and the type of thing you're printing. It can be a little overwhelming at times. I say that there are no 'correct' settings that you can plug in, but there are definitely people out there who can help. I looked at a number of different suggested settings while refining my prints, and there are many people on YouTube who can suggest settings. As I was working on prints I wanted to make sure that I understood the settings, however, and didn't just rely on what others said. In that way I could make fine adjustments when things weren't quite as I wanted. There was a design on Thingiverse (which has free 3D designs) which was really helpful with this.
This is designed to test the different capabilities of the 3D printer in a controlled environment, and is easier to diagnose the issues than simply printing a miniature and trying to figure out what went wrong. This was really helpful, but all it does is help identify the problem, you have to solve them yourself.
I've printed dozens of these in an effort to refine my settings, and every so often I would feel like I'd made good progress and try printing a miniature. It's fair to say that there are many things which can be magnified in printing a mini which you don't necessarily spot in those controlled conditions. I've got lots of prints like this one as well.
This isn't all of them by any means, but here is a collection of some of the bad prints.
So far, so frustrating! I did mention at the beginning that I'm happy with my prints now though, and there has been a lot of perseverance to get there. I realise that the post so far could sound quite negative, but that's not really the aim. I mentioned the mentality of 3D printing and that's where all this is leading me.
Although the process was frustrating at times, I also found it really interesting to learn, and got a real sense of satisfaction when the prints were improving. I don't think you need to be massively technical to engage in 3D printing (although I did build my printer as well), but it is definitely helpful to have a curiosity and be willing to persevere through the frustration. I know that for some people spending their free time battling with technology and software isn't high on their priority list. I completely understand that, and in that instance it might be that 3D printing isn't quite what you're looking for. If you're looking for a challenge, and a sense of satisfaction as you progress, then I would definitely recommend 3D printing. Here's a good print to end on a high note :)
If there are aspects of 3D printing you'd like me to write more about then let me know in the comments.
Goblin Squire :) 
Hi everyone :)
A little bonus blog post this week, and I wanted to highlight another small creator in the field of mini painting and hobbying - Geek Curio. Geek Curio is a one person operation with contented created by Andy, who also presents the videos and researches what goes into them. What I like about Andy's work is that it is varied across different aspects of the hobby, while focussing on things which miniature painters will find useful. One of the stated goals of Geek Curio is to raise up others in the hobby, and that very much accords with my philosophy. The videos created by Geek Curio are helpfully divided into different categories to indicate their purpose and intended audience, and categories include: Monday Musings; So you want to get into miniature painting?; Two goblins drinking beer and Sunday symposium. As the name suggests, 'So you want to get into miniature painting?' is a great resource for those in the early stages of their hobbying or even those thinking about diving in. My particular favourites are the Sunday symposium and Two goblins drinking beer. In the most recent Sunday symposium, Andy looks at the future of mini painting, with particular regard to costs. Check it out here:
If you enjoyed the video, make sure you like it and subscribe to the channel :)
'Two goblins drinking beer' is a series in which Andy sits down with other miniature painters and discusses their process and tips, and they look at some of that painter's miniatures. All the painters he's spoken to have been great, but with all respect to the other painters I would really recommend looking at the chat with Gorilla With a Brush. Gorilla is an amazing painter, and inspiration to me, and he's a great guy as well. You can find that video at: https://youtu.be/TWMbMEIQpzE and I would really recommend checking it out. I'm glad to be able to call Andy a friend, and it is through hobbying that we have become so. We have similar outlooks to miniatures painting and the community, and I think that the work he's doing is fantastic. Goblin Squire :) 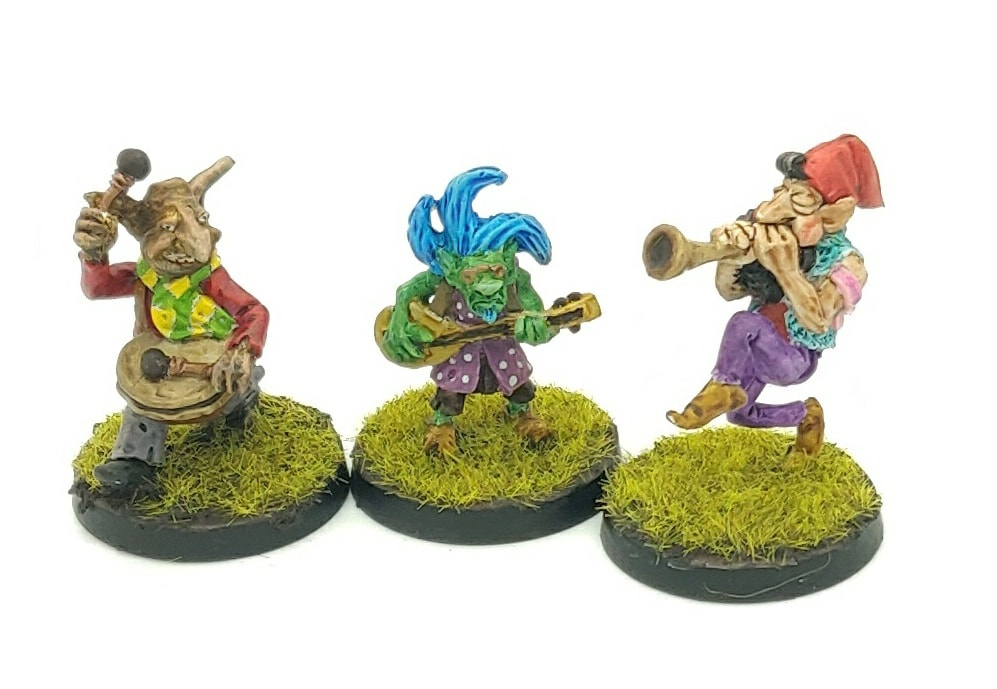
Hi everyone :)
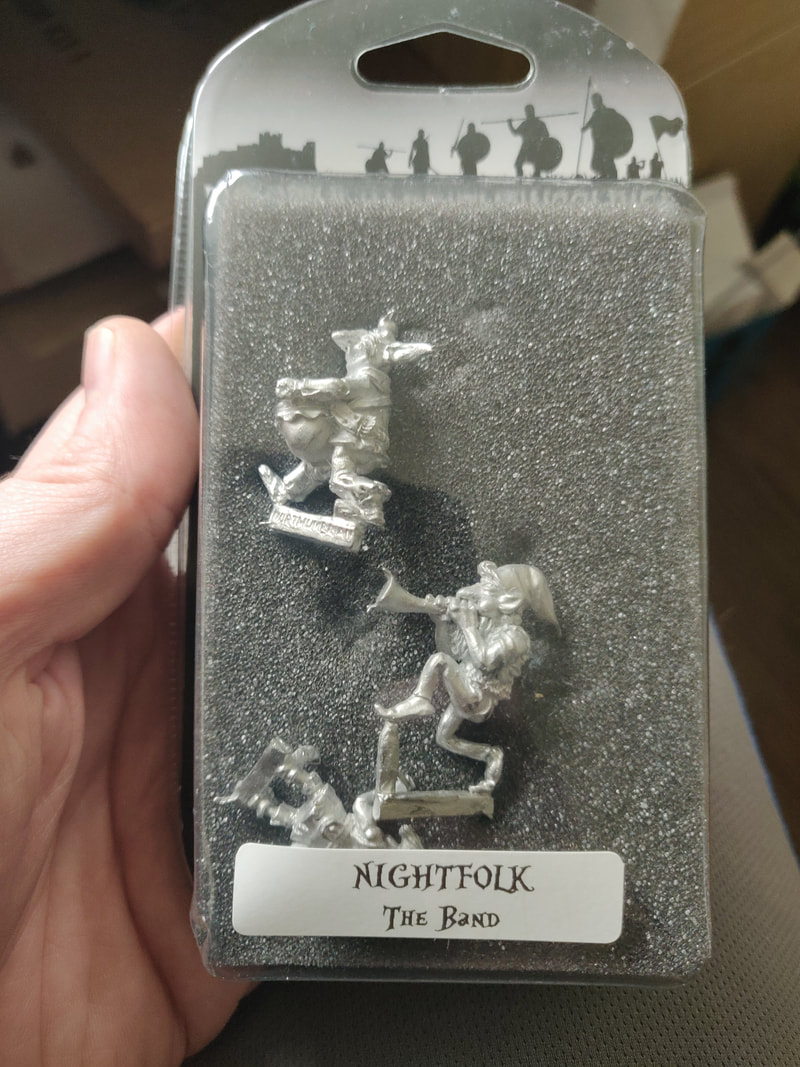
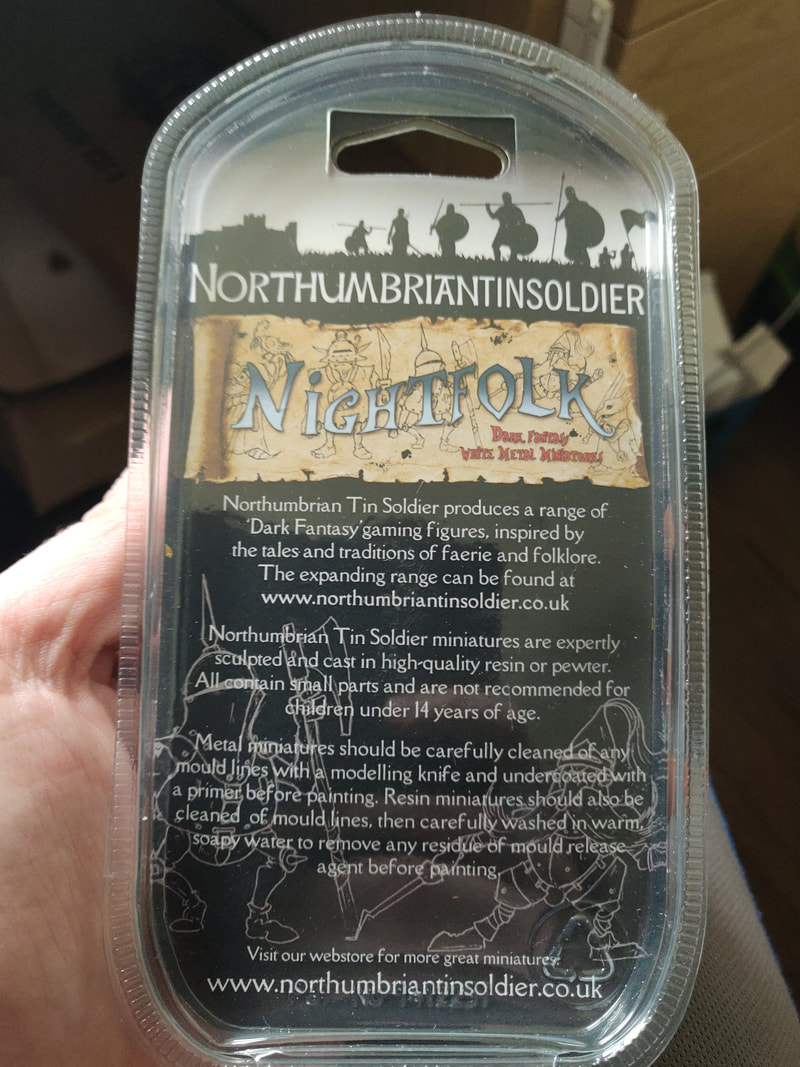
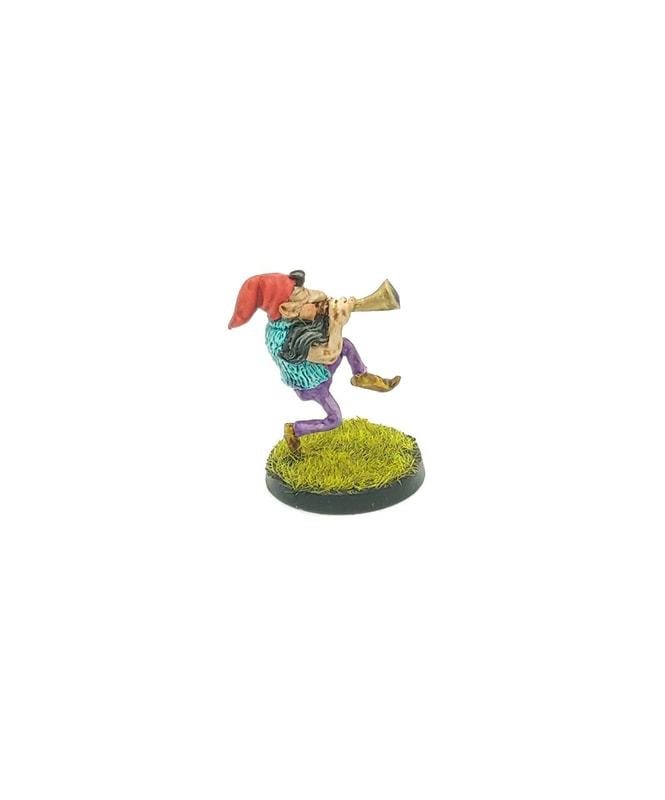
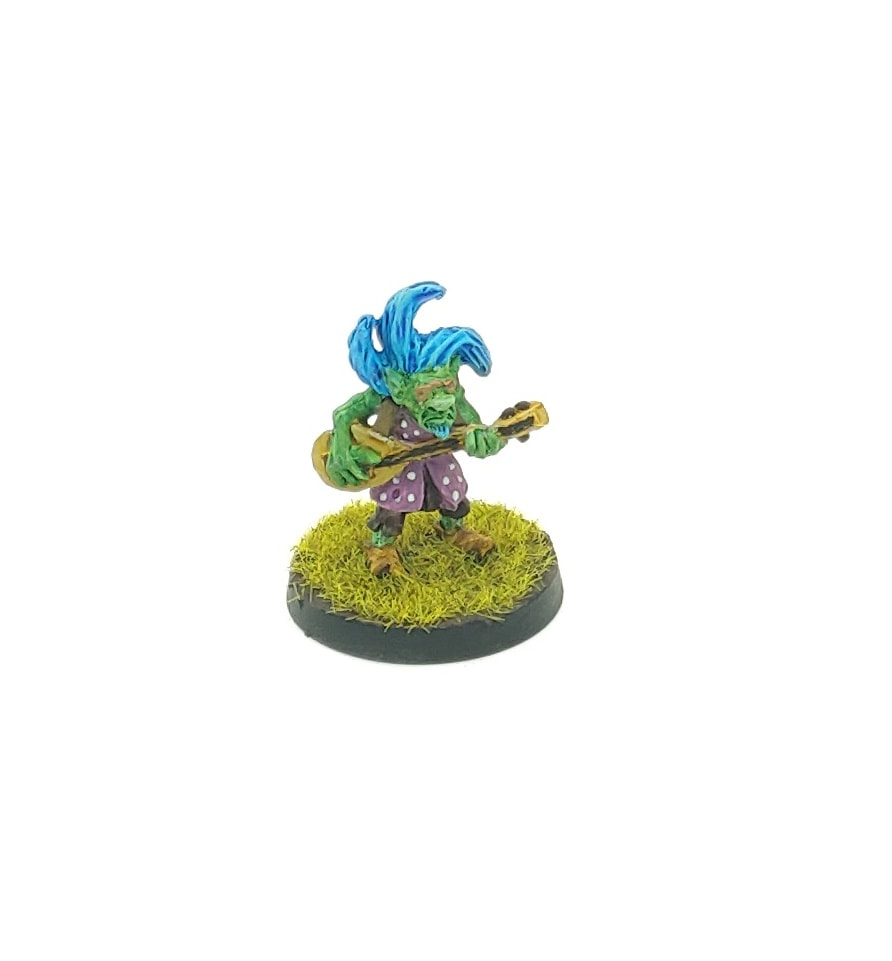
These colourful and fun miniatures are 'The Band' from Northumbrian Tin Soldier's Nightfolk collection. From left to right, they are 'Mr. Bangs', 'Mr. Strings' and 'Mr. Toots'. OK, so you probably could've guessed which was which! As ever, I'm not being paid to write this, and I paid for the miniatures. Northumbrian Tin Soldier are a small manufacturer of miniatures based in the North East of England. These minis are hand sculpted by them and are 28mm scale. They describe the Nightfolk range as being 'Inspired by tales of faerie and fable, our latest Nightfolk fantasy miniatures are deliberately 'Old School' in style with just a little added touch of the bizarre.' I think it's fair to say that it's an accurate description! I have a few others from the range which are still in my 'to paint' hoard, and they all have the same sense of humour.
I bought these in a single pack, although you can buy them individually, and they are £10 for the three. I'm going to come straight out and say that I loved painting these miniatures. I can't put my finger on an exact reason, but I think that the sculpts are beautiful - a sense of carefree exuberance, with a good attention to detail.
I decided right from the start that I wanted these to be colourful minis, and I really enjoyed putting together the palettes for each of them. One was actually inspired by the football team I support, and another was based on the colours of a team a friend of mine supports. 
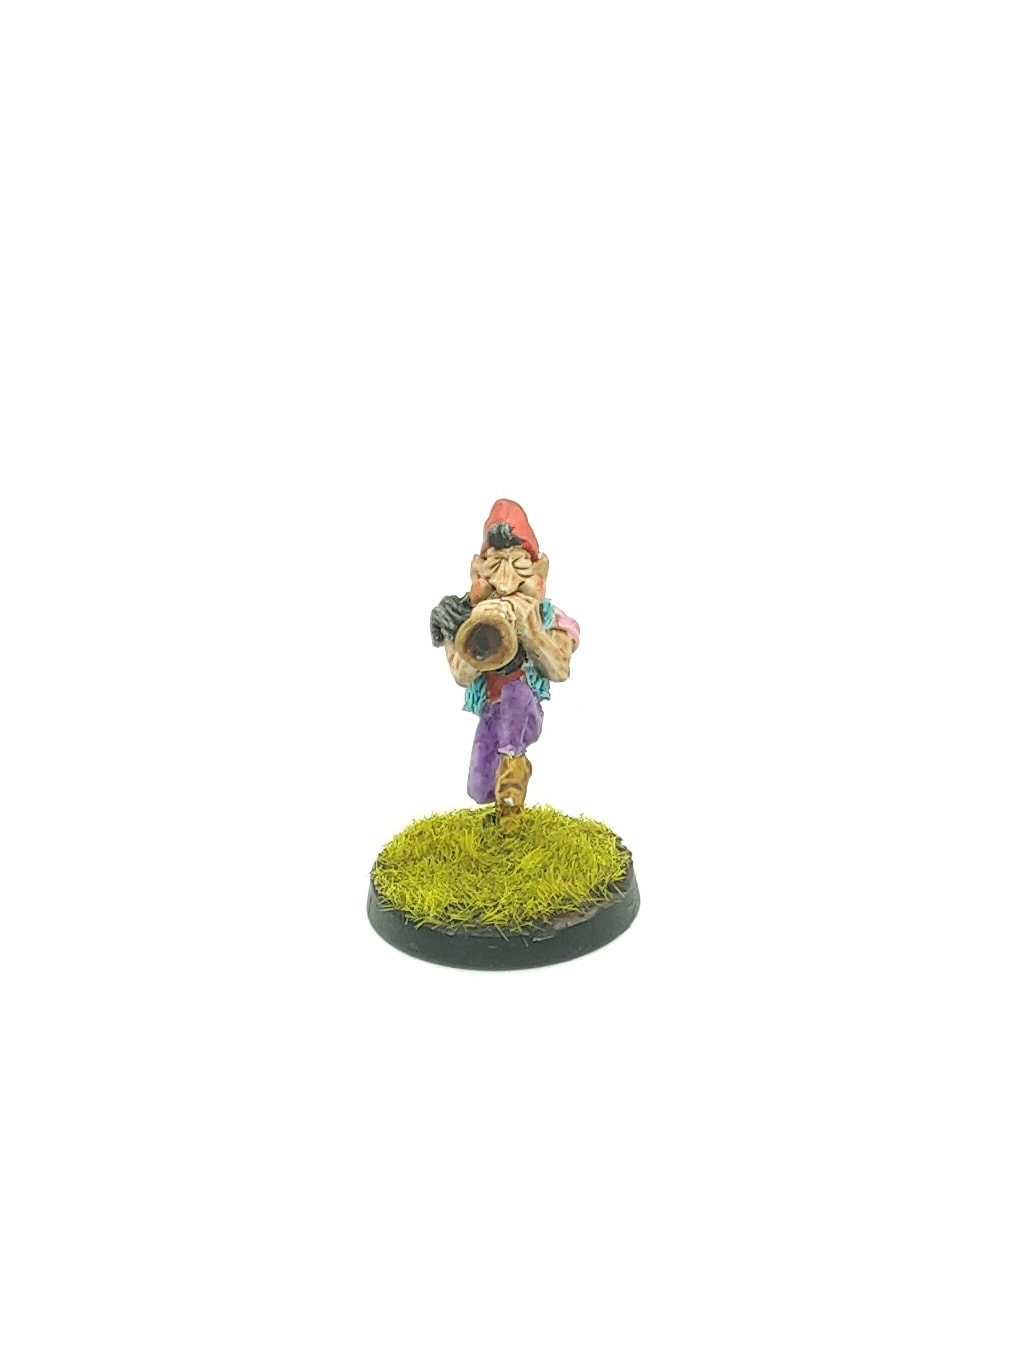
I started with Mr. Toots, and the thing which immediately drew my attention here was the effort he was clearly putting in to blowing his horn! His cheeks are puffed out, and I decided that he needed red cheeks to indicate quite how hard he was blowing.
Next came Mr. Bangs, who also just looks like he's having a whale of a time! At the encouragement of my wife I decided to freehand the yellow and green scarf and I'm really pleased with how it all came out. The scarf and the jacket are the indications of my football team, by the way, being colours associated with Manchester United.
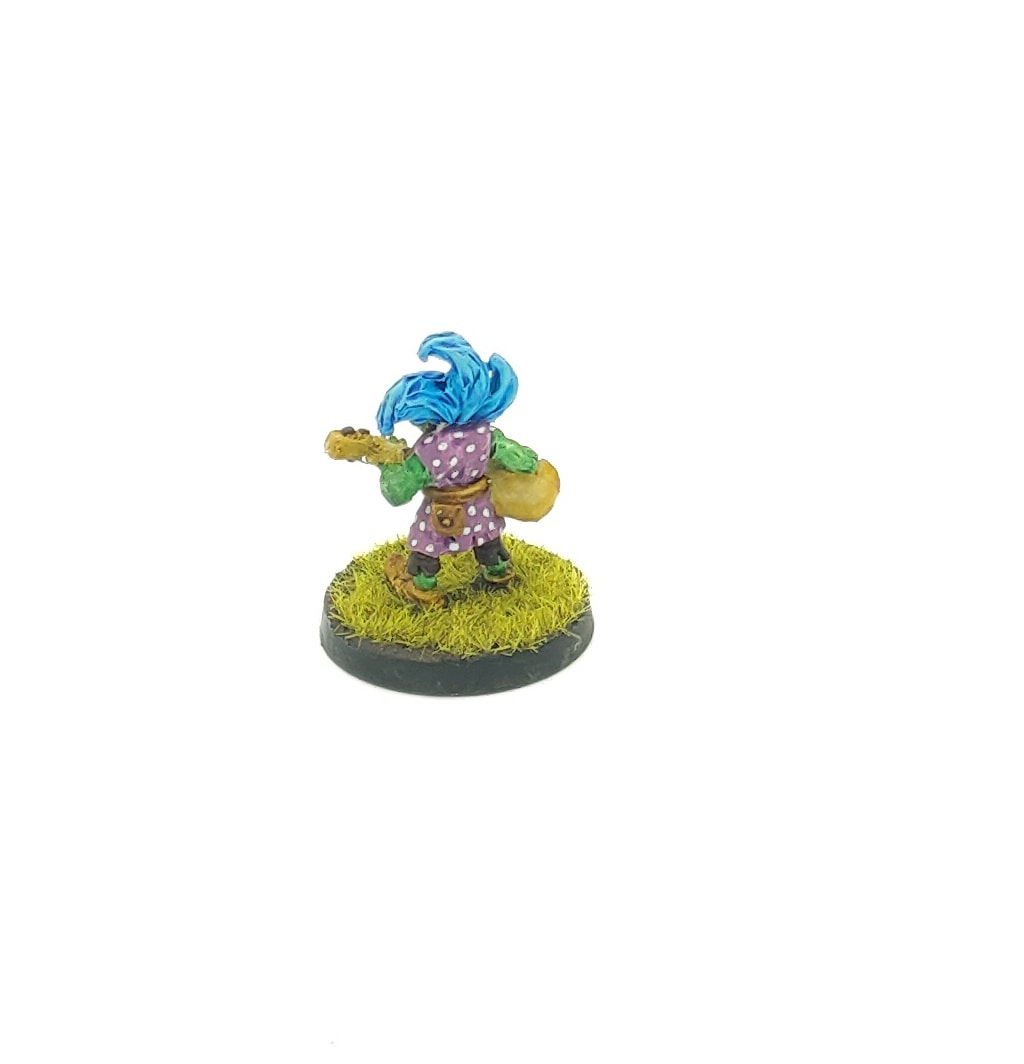
Finally came Mr. Strings, with colours inspired by West Ham United, which are the team supported by a friend. Having had success with the freehand scarf on Mr. Bangs, I decided to add the polka dots to Mr. Strings, and again I'm pleased with the result.
Conclusion
I haven't exactly hidden my feelings towards these miniatures, but in case it needs saying again - I really like them! They were a lot of fun to paint, and the overall effect of them still brings a smile to my face when I see them.
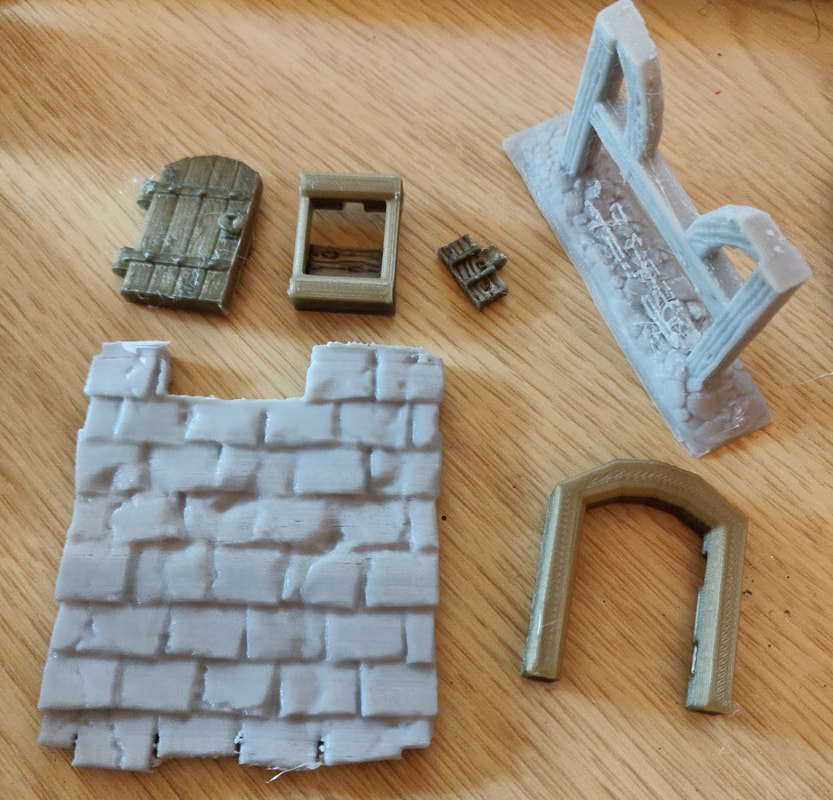
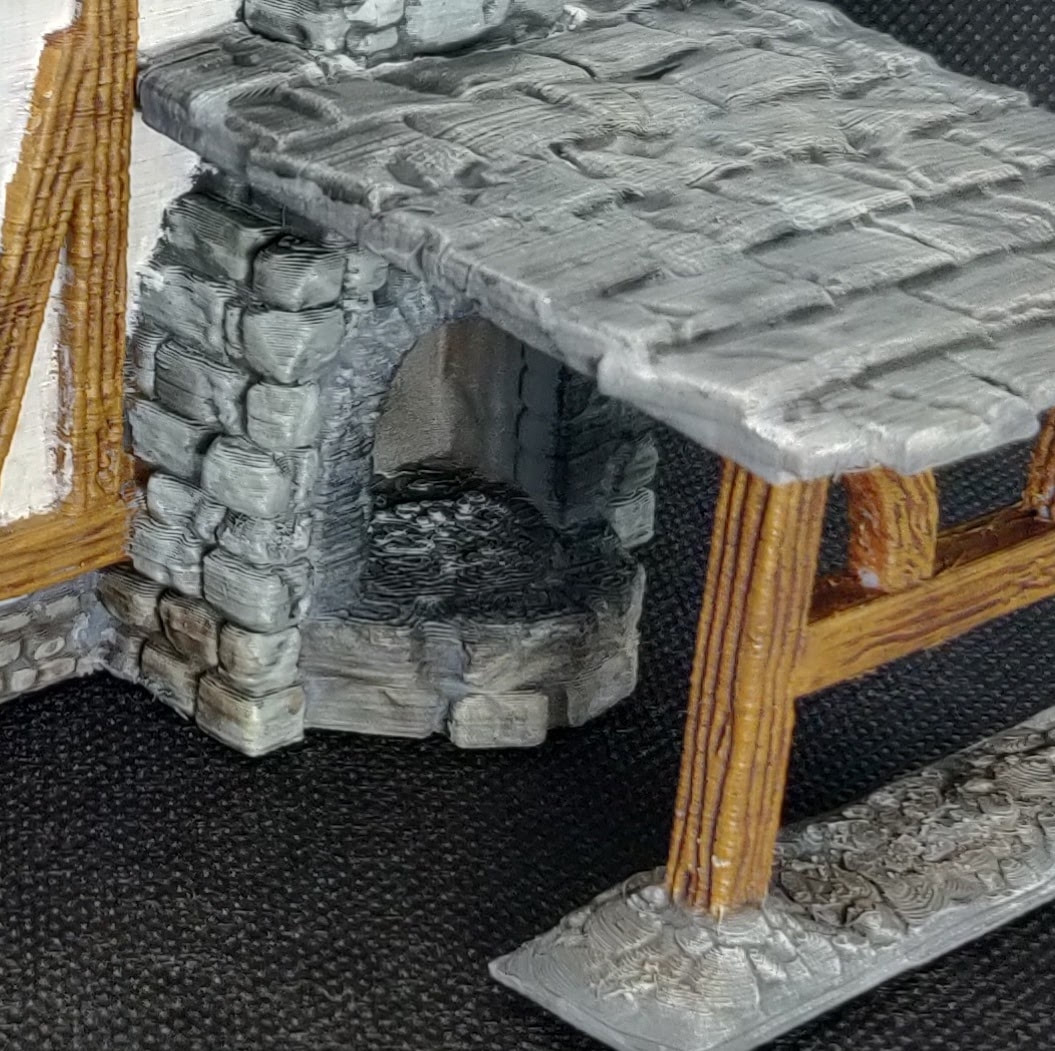
I guess that the style of these isn't necessarily suited to dark and tense games, but I think that they could add value to any TTRPG game or similar. No matter how bleak and challenging a dungeon has been, these could always raise a smile from players arriving at an inn to find them playing. I think any of them could work for a bard NPC or even player character in the right circumstances as well. £10 is a real bargain for these minis in my opinion - they are high quality and unique sculpts. I would recommend having a look at the Nightfolk collection on the Northumbrian Tin Soldier website, actually, because there are many interesting (and very good value) pieces. Goblin Squire :) 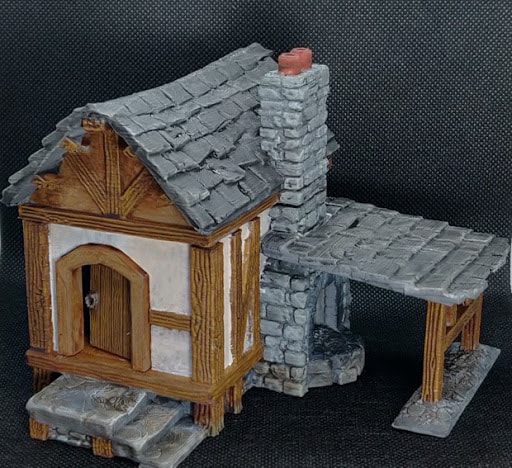 Hi everyone, Today's blog post is a slight reworking of a review I wrote in 2019 on a different platform - I'm going to be looking at the Blacksmith's Workshop which is produced and sold by Mighty Lancer Games. It is part of a range of 3D printed terrain they're creating, designed by Dark Realms Forge. For the avoidance of any doubt, I paid for this piece and am reviewing it as a customer. I provide links here which are part of their affiliate program, but this review was written before that existed, so it in no way affected my findings :) The building comes in a 9 piece set and costs £14.99. You can find the Blacksmith's Workshop here, and the full range here. The pieces feel lighter than you might expect an equivalent piece which had been cast to be, but they felt high quality, and I didn't have any issues with bending, breaking or chipping pieces. Overall they have a good quality feel to them.
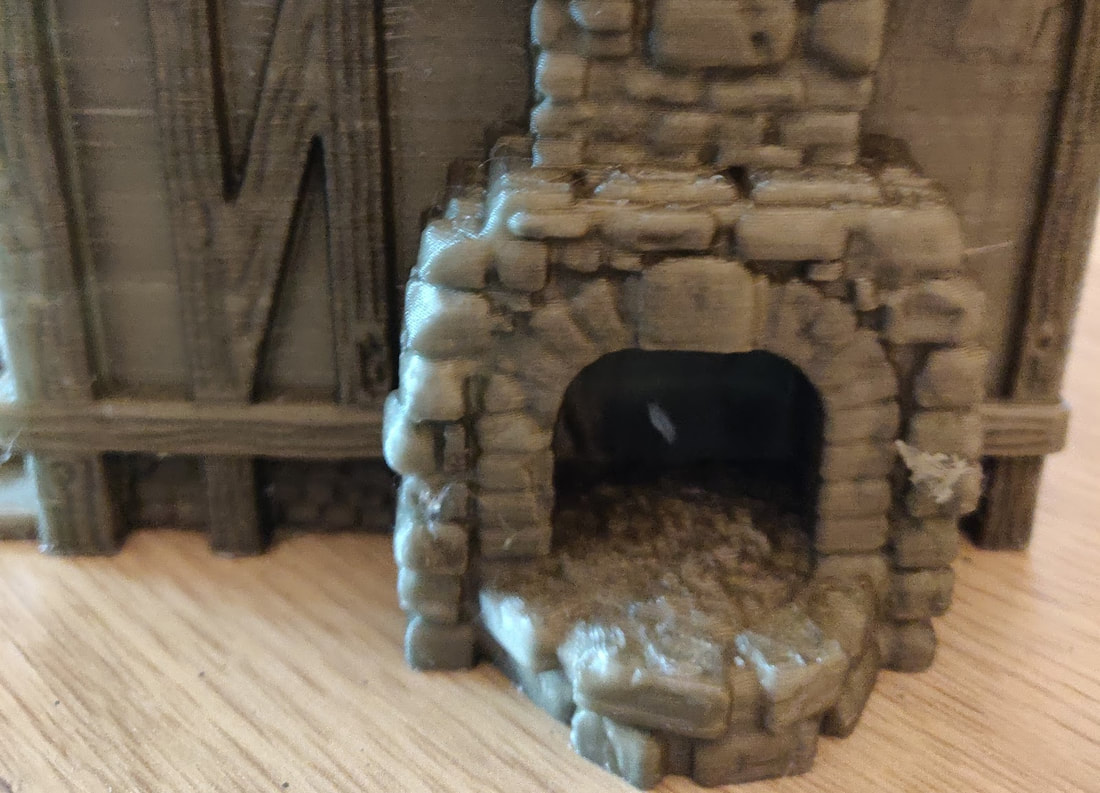
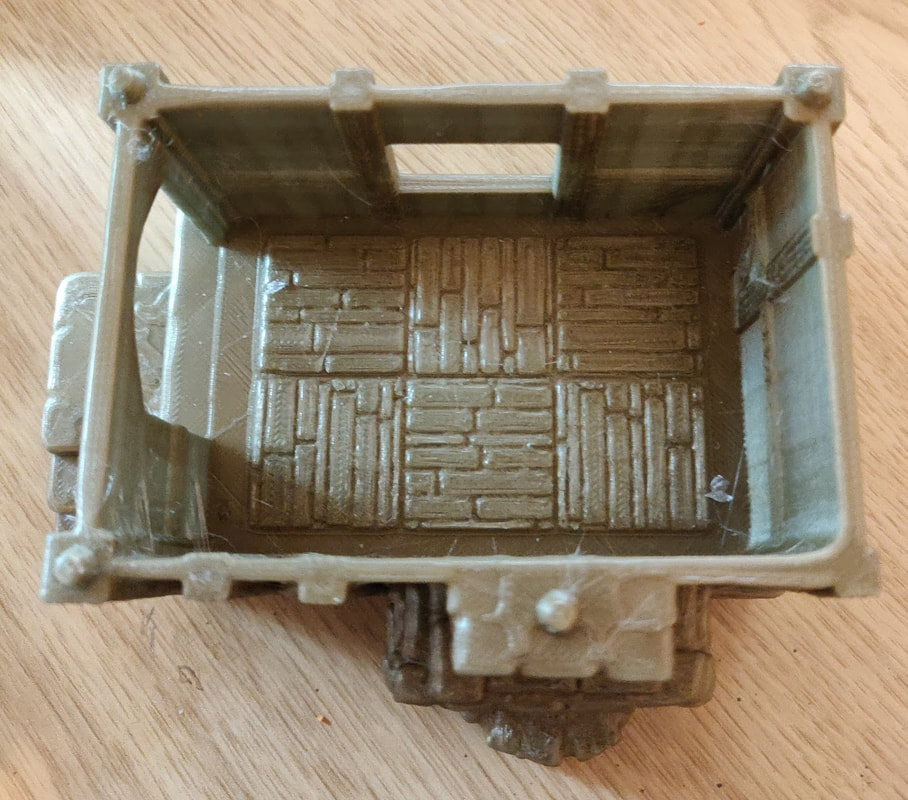
The printing was high quality, and the only real issue I had with the pieces was in terms of the flashing. It wasn't just the amount, but there were a few areas where excess plastic was filling in the detail. This picture might give you an idea. 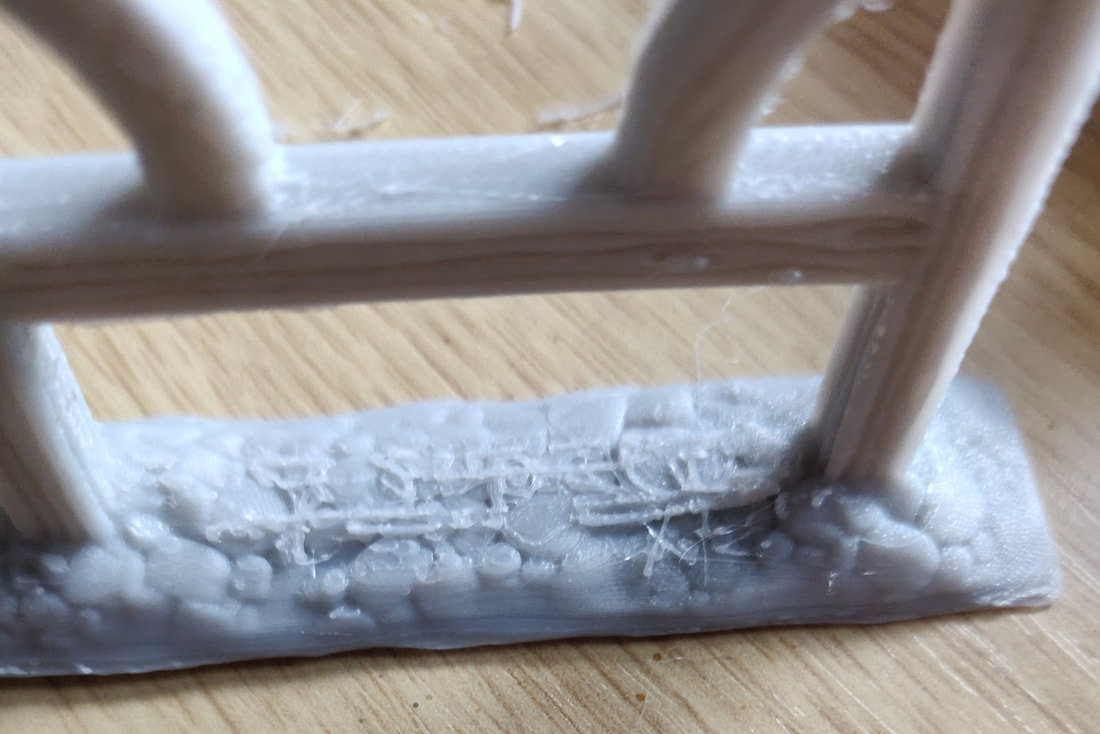 This was a bit annoying, and took a while to sort out, but it's not the end of the world. It took me about an hour with a craft knife and file to clean the whole model - with 3D printed minis you want to make sure you remove all the thin strands or filaments, or they'll really get in the way when it comes to the detail work. Once that was complete, I have to say I was very impressed with the level of detail on this. Both the wood and stone have a nice finish to them, and I was very pleased that there was even some detail inside.
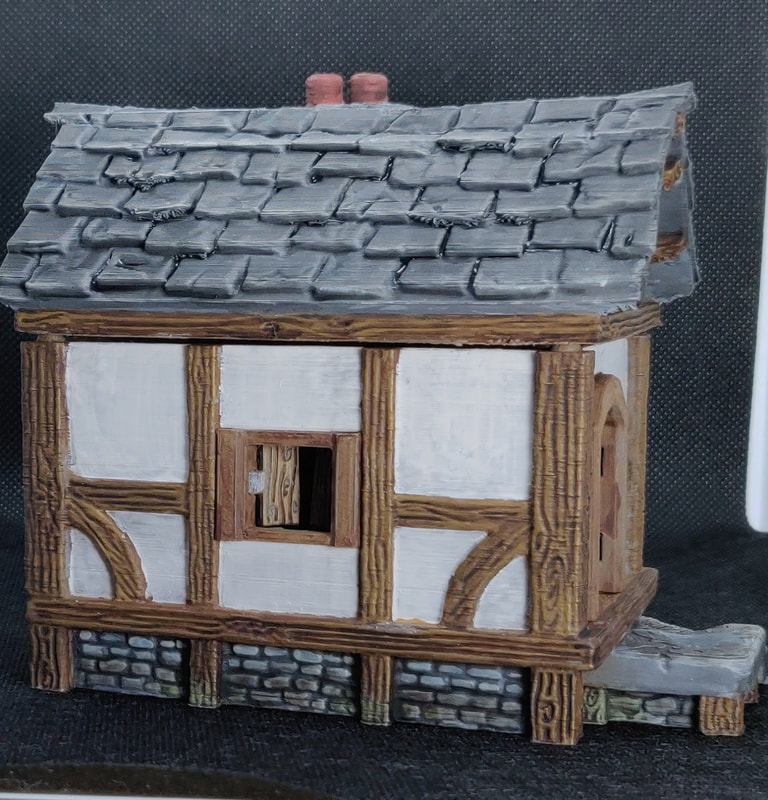
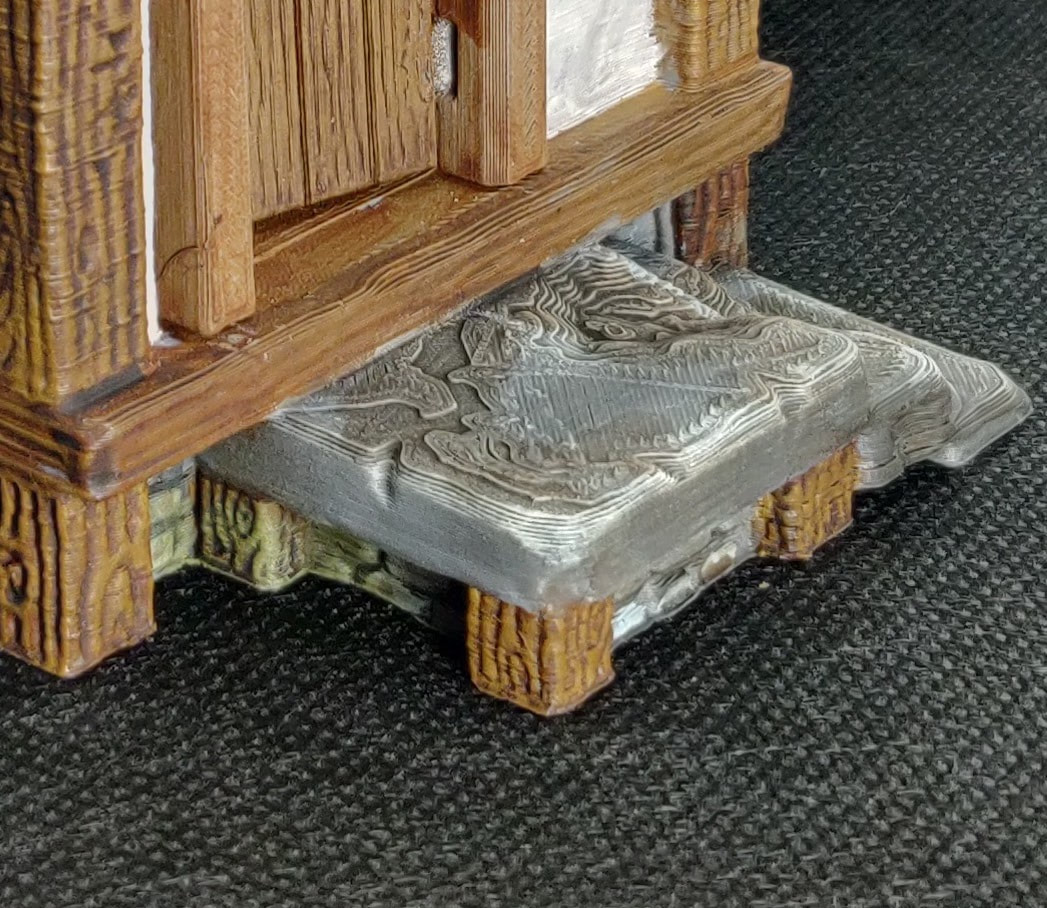
My only slight concern with the detail and texture was with the slate tiles. Here there was fairly pronounced layering from the 3D printing process. I was concerned that this would show through on the final piece and this was partially true. I had to alter my usual technique slightly as the ridges were catching the paint (so I think the roof is a little less 'worked' than I normally would) but I'm pretty happy with the finish anyway.  Beyond that I have no real complaints. The priming process was very easy - my spray primer worked with no problem, all the pieces fitted together well and the paint took to it very nicely. I won't go into the details of how I painted it here (I'll stick with the review in this post), but I'm pleased with how it turned out.
ConclusionI've tried to be balanced and open about the strengths and weaknesses of this piece, so where did that land me overall? Well, I think that this is an excellent value piece of terrain, and hard to beat at the price. Yes, there are some little issues here and there as I've pointed out, but they shouldn't put you off if you're looking for something at the cheaper end of the market. Realistically, this might not be what you're looking for if you're painting to a showcase standard, but then you're going to be looking at 4 or 5 times the price. Similarly, if you'd rather pay a little more to avoid the hassle of removing the flashing then there are other, more expensive, options available. This would make an excellent addition to a D&D or pathfinder battle map or a wargame table and, at £14.99 looks pretty hard to beat. Mighty Lancer GamesMighty Lancer Games is a small, independent games shop in the UK with a very broad range of stock and excellent customer service. Selling Reaper Miniatures, Games Workshop, Mantic and many, many more, they are my 'go to' for painting and gaming supplies.
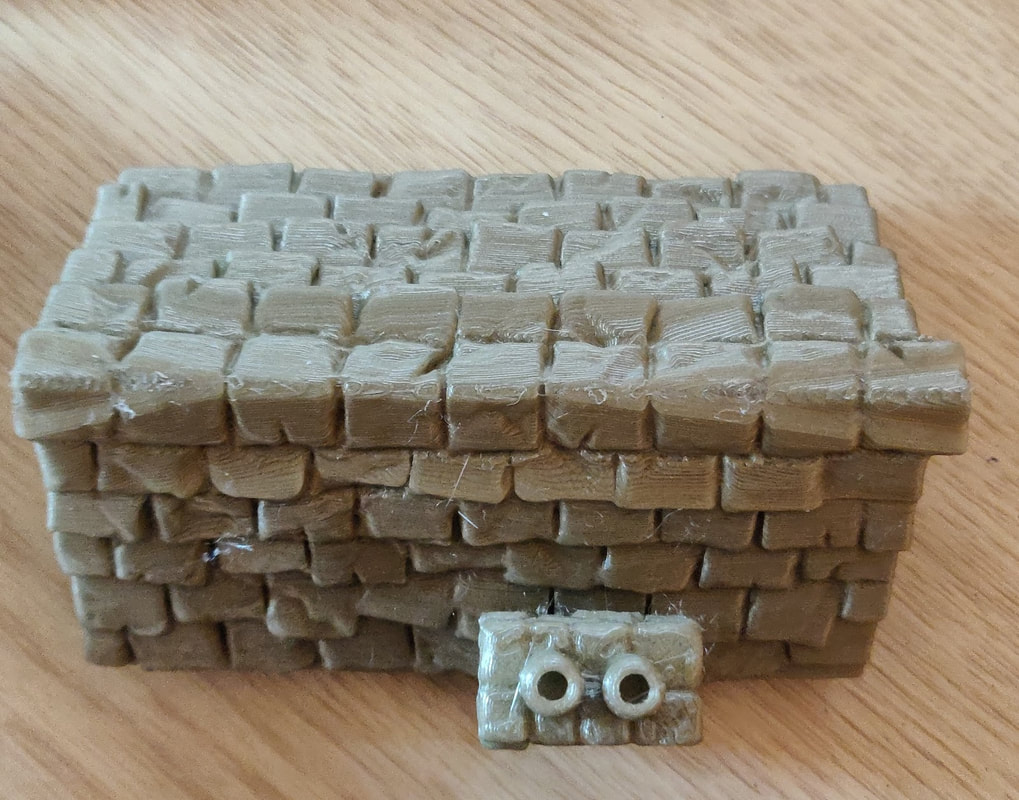
Check them out here. Goblin Squire :) 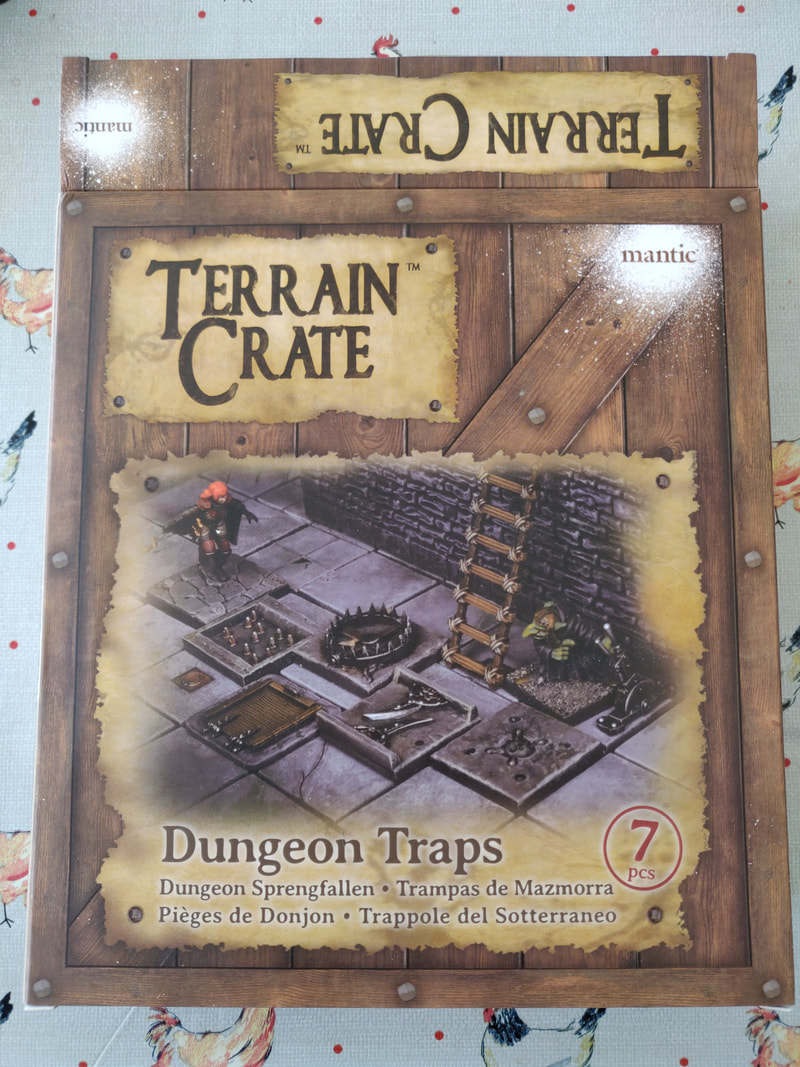 Hi everyone :) Today I'm going to be looking at the Mantic Games 'Dungeon Traps' terrain crate which I painted as my 'minis of the day' last week. I'll also talk a little about Mantic Games and the role of terrain in tabletop games. Dungeon TrapsThe box describes this as a seven piece set, which confused me slightly as I opened it and found eight pieces in there! Having inspected the box closely I think that there was an extra piece shipped in mine. It appears to be a wooden block attached to a rope. Not knowing exactly what it was didn't stop me painting it, though! Here are all the pieces primed: 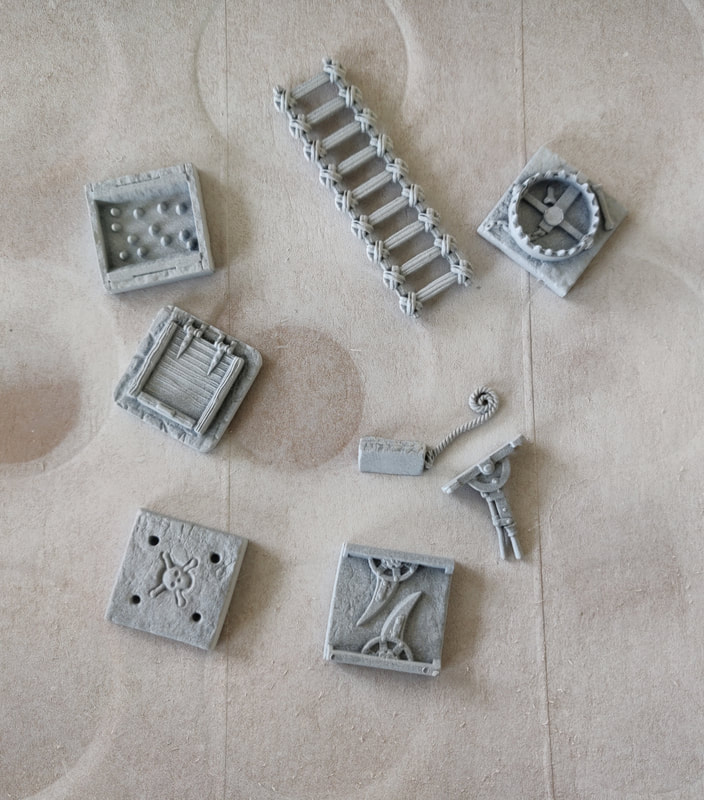 Painting terrain, particularly scatter terrain like this, can be a fairly simple task. Creating the stone look and adding some metals is a quick and easy way to get something ready for the table. I wanted to go a little further, though, so added a few extra effects myself. Given that some of these traps looked pretty vicious I wanted to add a little blood to heighten the feeling of danger. My interpretation of miniatures, and the resulting style of painting, emphasises that these are not new and pristine. I like to think that these traps have been in place a while and that the adventurers encountering them now are not the first. I decided to add a skull to the pit trap for exactly this reason - if the players are not careful then they may share that creatures fate. 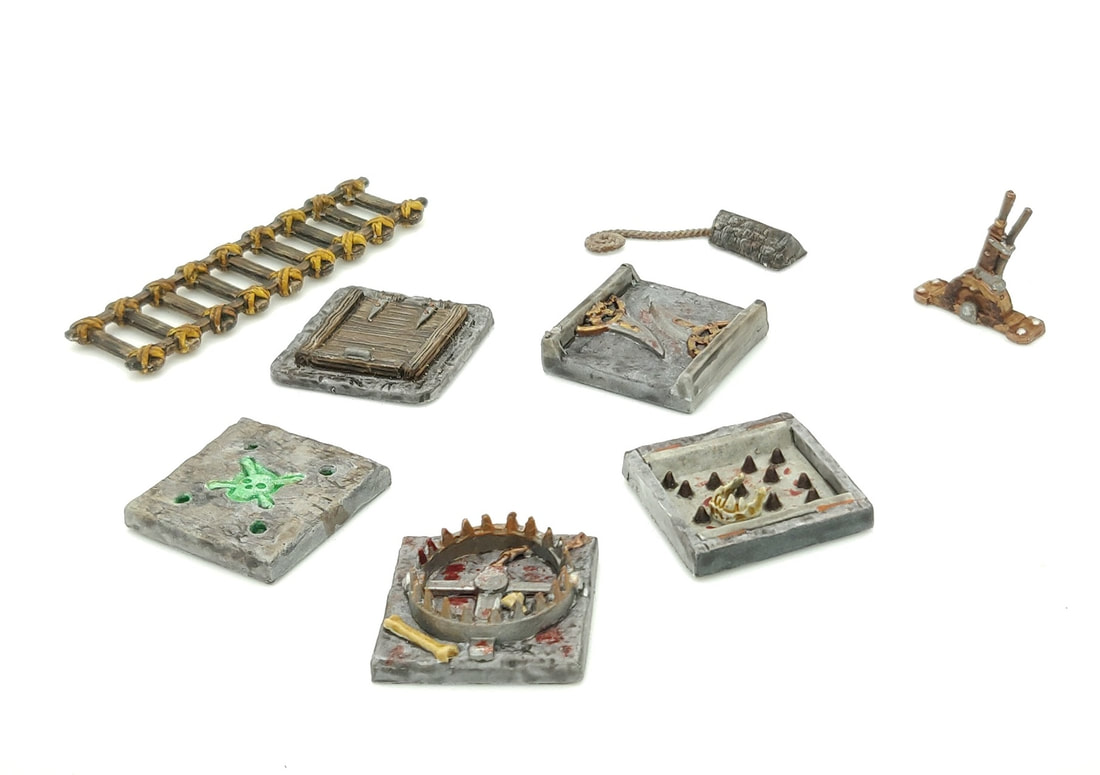 The quality of these pieces is good. They are made of hard plastic and I experienced none of the warping issues you can find with some plastic miniatures. The level of detail is good, without being outstanding, but I believe that it is good for the cost. These cost £7, although it seems as though the set may no longer be available. If you were interested in picking them up they now form part of a larger set, the 'Dark Lord's Tower'. 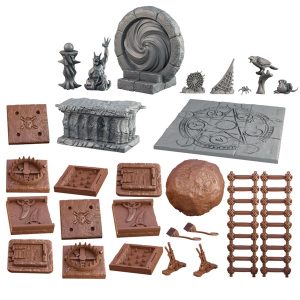 Image from Mantic Games website. Mantic GamesMantic Games is a fairly large miniature company based in Nottingham in England. Realistically you'd probably have to call them a big company if there wasn't an even larger one also based in Nottingham... (the GW headquarters is there)(I'm sure they'd love me mentioning GW in a blog post about Mantic!). Mantic make some complete battle games including Kings of War and Vanguard, as well as games based on The Walking Dead and Hellboy. In the last couple of years, however, they've been making quite a big impression with their production of the 'Terrain Crate' range. These traps are one small part of the range, but there are sets which are designed to enliven pretty much any setting you might need, from mines to libraries to markets. Terrain in Tabletop GamingFor me, terrain and scenery is one of the quickest and easiest ways to build immersion in your tabletop game. It won't surprise anyone to know that I am a fan of miniatures in gaming, but I think that well used terrain can be just as useful in drawing people into the gaming world. Miniatures can be a purely functional thing, allowing players to understand the space they and their opponents occupy and allowing them to plan combat accordingly. It can also be much more, though, and terrain can be the next step in building that world. 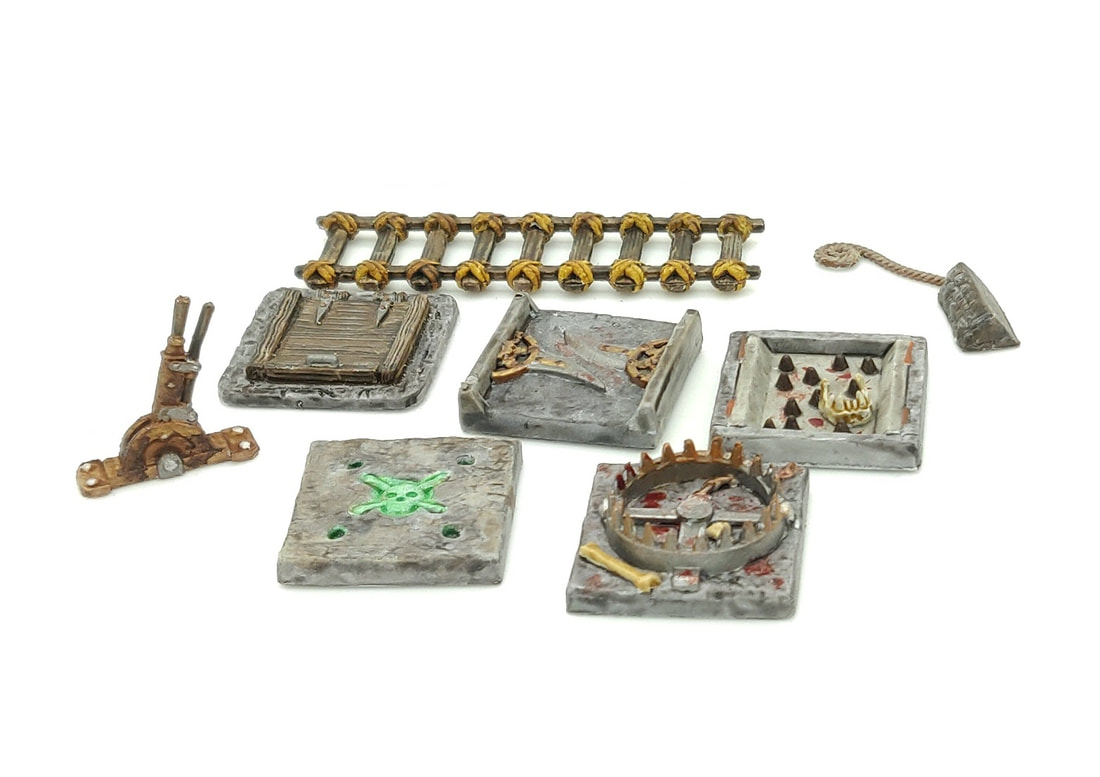 As I mentioned, I wanted to build some more into these pieces, but even simply painted terrain can be a great addition to the tabletop.
I think that the Mantic Terrain crates are good value - the £7.99 I paid for this is probably equivalent to one miniature from a lot of manufacturers - and they have a good selection to choose from. Don't feel restrained to just these crates, though. There are lots of items like this which can liven up your table - I even print some of them over on my 3D printing page! Goblin Squire :)
Hi everyone,
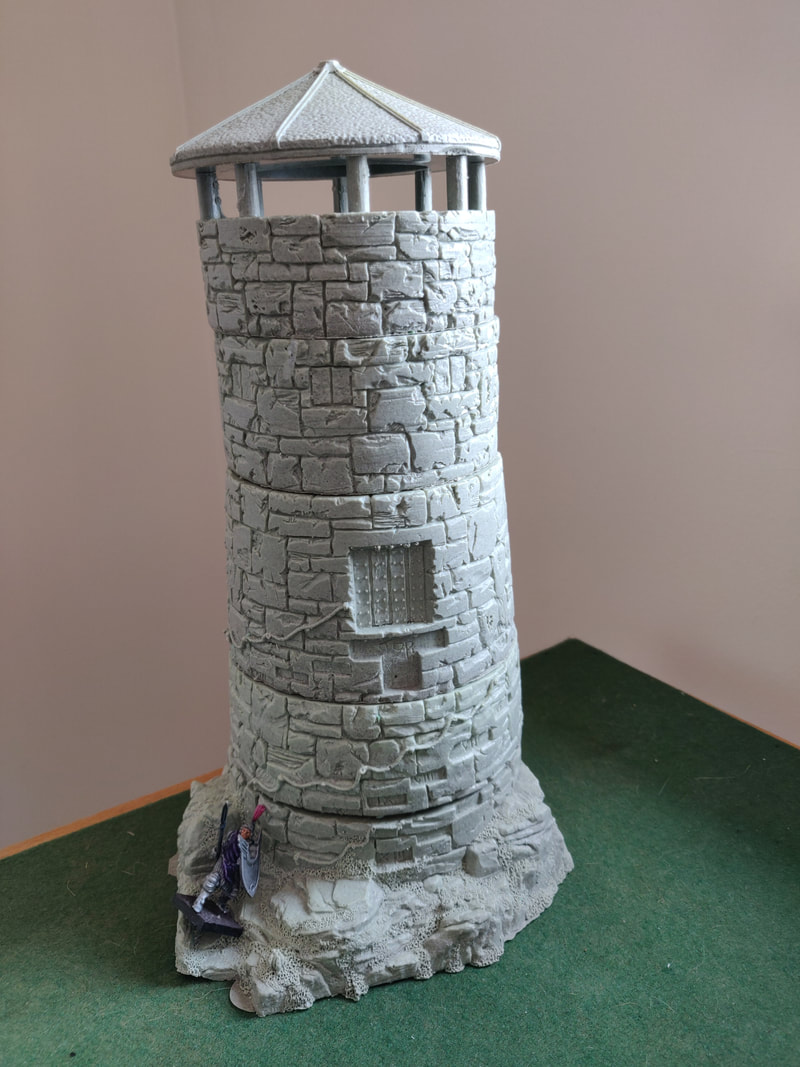
Those of you who have been reading my blog for a while will know that I like to highlight small creators and businesses. I've already written a blog post about Fenris Games, and I wasn't necessarily intending to write another, but the quality of the pieces I received in my most recent order made up my mind for me! The usual disclaimers apply - I haven't been paid to write this, nor have I received anything free. I ordered a few pieces, but the two biggest items were an Ancient Dwarf Watchtower and a Dwarf Fortress, and those are the pieces I'm going to look at today.
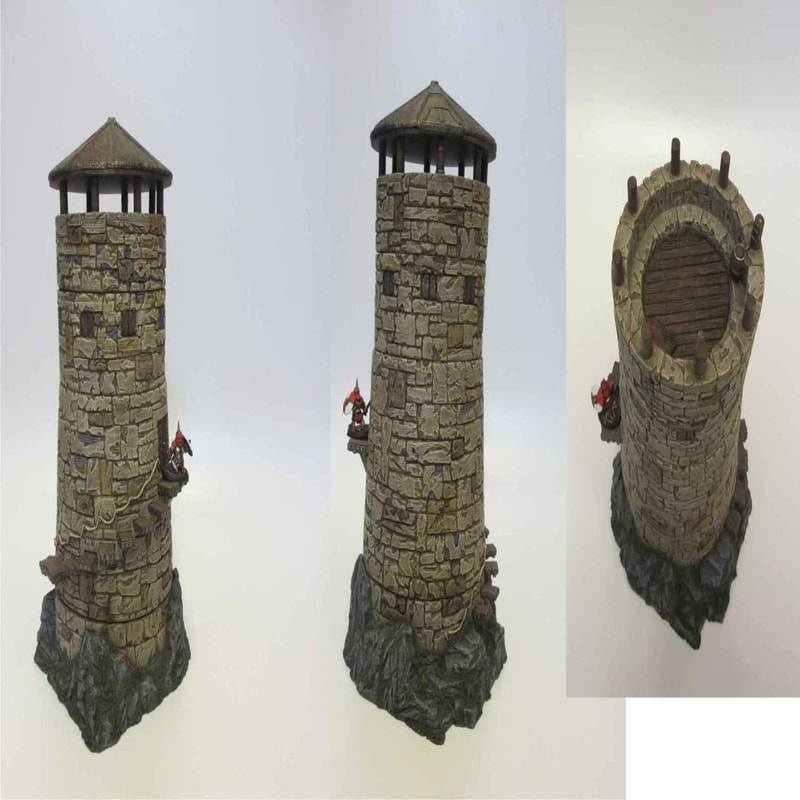
These photos are taken from the Fenris Games website, and thus are copyright Fenris Games.
Both of these would have to qualify as centre pieces for your table - they are very significant pieces which, being made of resin, are pretty heavy.
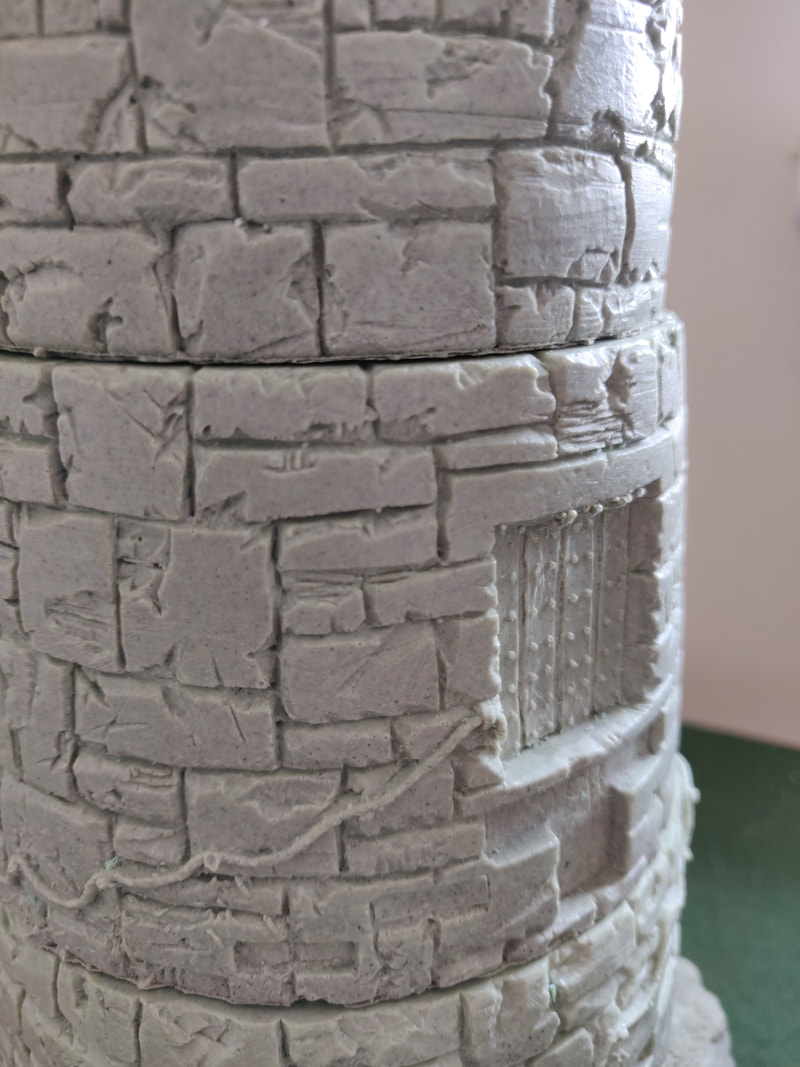
I'll start with the Watchtower, which is the larger of the two pieces. It costs £65, so I was expecting an impressive piece of terrain, but this blew me away. The scale is just as impressive as the above photo makes it look. It's five stories tall, plus the roof, and comes with all the outside steps you can see.
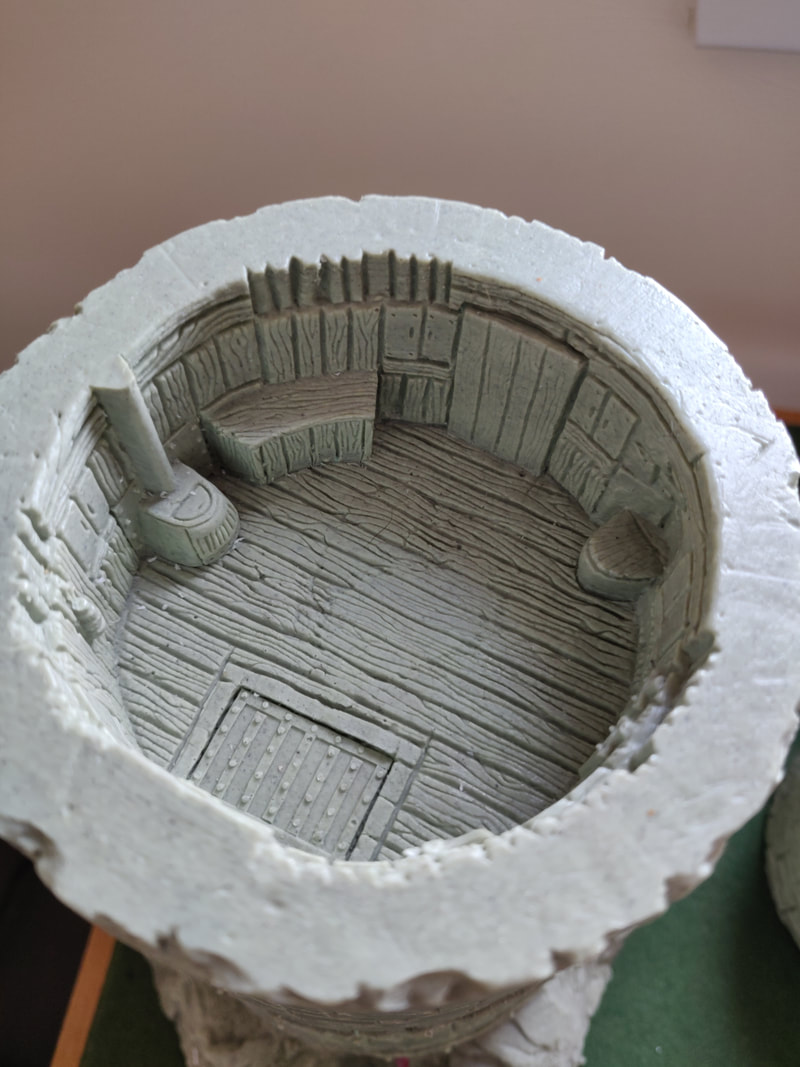
The other area in which the sculptor goes above and beyond with this is in sculpting internal details. Again, you could absolutely get away with leaving the inside blank, but not for this tower. As it is sent out, none of the tiers are attached, so you can work out how best to use this in your game.
As I mentioned above, this tower is £65, and that's undoubtedly a good chunk of money in trying financial times. I can't think, though, of a piece of terrain which is better value than this. For that you're getting a beautiful model which would take the breath away from TTRPG players or wargamers.
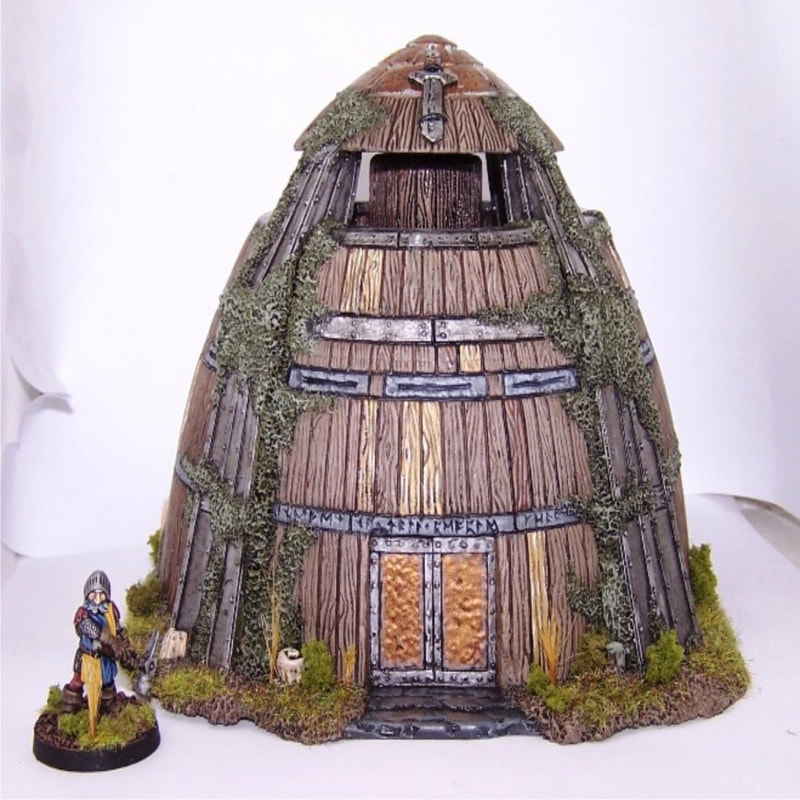
If £65 is a little out of budget at the moment, Fenris Games has other possibilities as well. This Dwarf Fortress comes in at £28 and is another great option. As you'd expect for the price difference it's not quite as large as the watch tower, but it is just as detailed. 
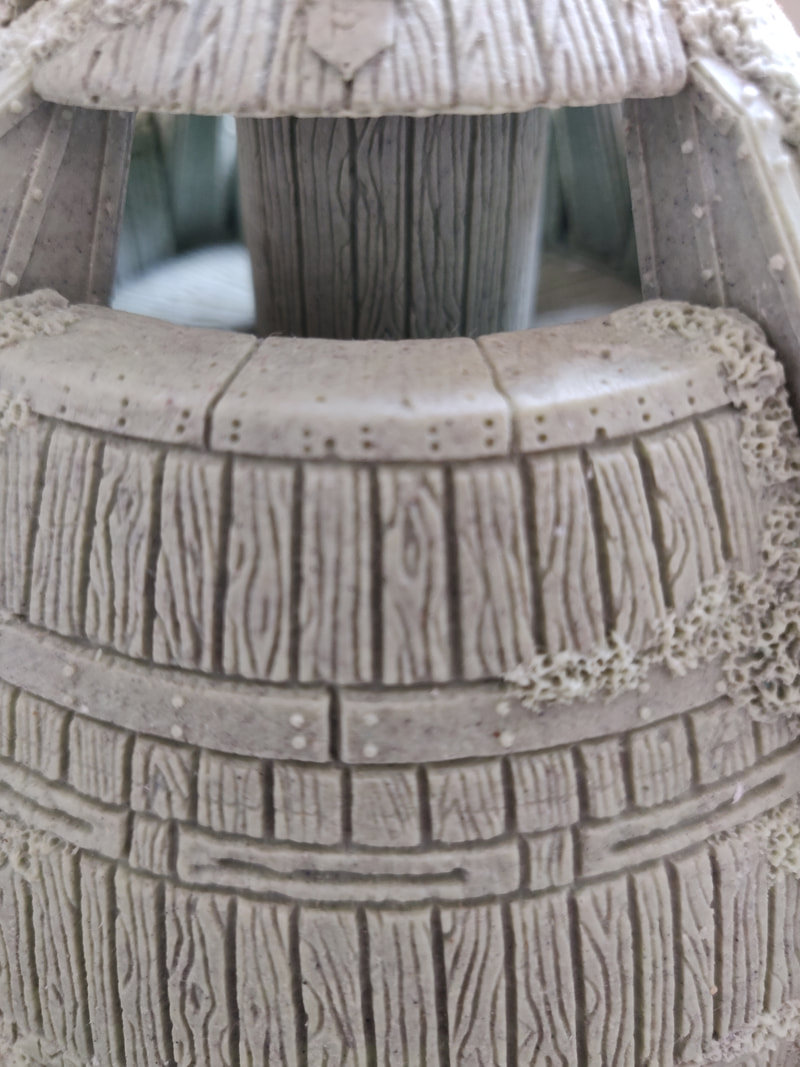
The detail is again exquisite - the clarity of the runes is fantastic for a piece of this scale. Both of these are going to make for interesting and exciting D&D sessions!
If these aren't quite what you're looking for, or aren't quite in your budget, head over to fenrisgames.com/shop to see their full range.
Goblin Squire :)
Hi everyone :) Today I want to take some time to reflect back on the minis I've painted in the last few weeks, and my commitment to paint a miniature every day. In case you haven't seen, over on twitter I have been painting using the hashtag #MiniADay and you can find all the pictures if you search for the hashtag. I'm currently on day 30, so the one month mark seemed like a good time to reflect on the process so far. Why a Mini a Day?I decided to start painting a mini every day because I could see my pile of half-painted miniatures growing and growing, while my collection of completed minis stayed about the same size. I was having no problem completing miniatures for commissions or specific projects, but wasn't finishing many others. Unfortunately I am someone who often needs deadlines and accountability in order to complete things. As I was staring at the minis which were unpainted I decided to use that to my advantage and publicly commit myself to finishing and posting a miniature every single day.
A Sense of AchievementWhen I started this I knew that every day wouldn't be easy. There are some days which have been really busy and it's been difficult to find the time to paint. In some ways, though, those have been the most rewarding when I see something completed at the end of the day. I have to be honest and say that I had a real sense of achievement as I looked back over all the photos of the miniatures from through the month. What took me 30 days to paint could have taken me months with the rate I was completing minis before I started this. I've decided that I'm going to create a slideshow video over the next few days to put up on YouTube with the hope of inspiring others.
Nowhere to hideOne thing I have struggled with is that committing to posting every day means that I have nowhere to hide. If I reach the end of the day and absolutely hate what I've painted I still have to post it. This cuts both ways I think. I don't think that there is anything wrong with people posting work which they don't think is great, especially if they learned something from the process. That is very easy to say, and much harder to do though! There is one piece from through the month which I absolutely hate, but I was trying something new. Does that mean it should be hidden? Well, I'm going to take the middle ground and, having posted it on twitter, not include it in this post! Having some gentle pressure to post things we're not proud of can be helpful both for ourselves and for new painters who can see that we're all learning. That said, however, I don't think anyone should feel real pressure to do something they're not comfortable with since the idea of mini painting is to have fun. Something for me to keep thinking about... Choice of MiniaturesA concern I had going into #MiniADay was that I would end up painting only simple minis because they would be the easiest to get painted. I think that temptation has been present at times, but it certainly hasn't stopped me from painting more ambitious miniatures.
Giving twitter followers the opportunity to vote on a miniature for me to paint was certainly helpful. They picked the Zombie Dragon above, and I was able to paint it over a few days while still completing one each day. I've now included the chance to choose miniatures for me to paint for all my supporters on Patreon, so I'm sure they'll keep giving me interesting and challenging minis to paint! Trying new thingsAnother danger I anticipated with this project was that I would retreat into a comfort zone of painting, sticking to tried and trusted techniques and not stretching myself. This has been a more difficult issue for me to stay on top of, but I have definitely tried some new things.
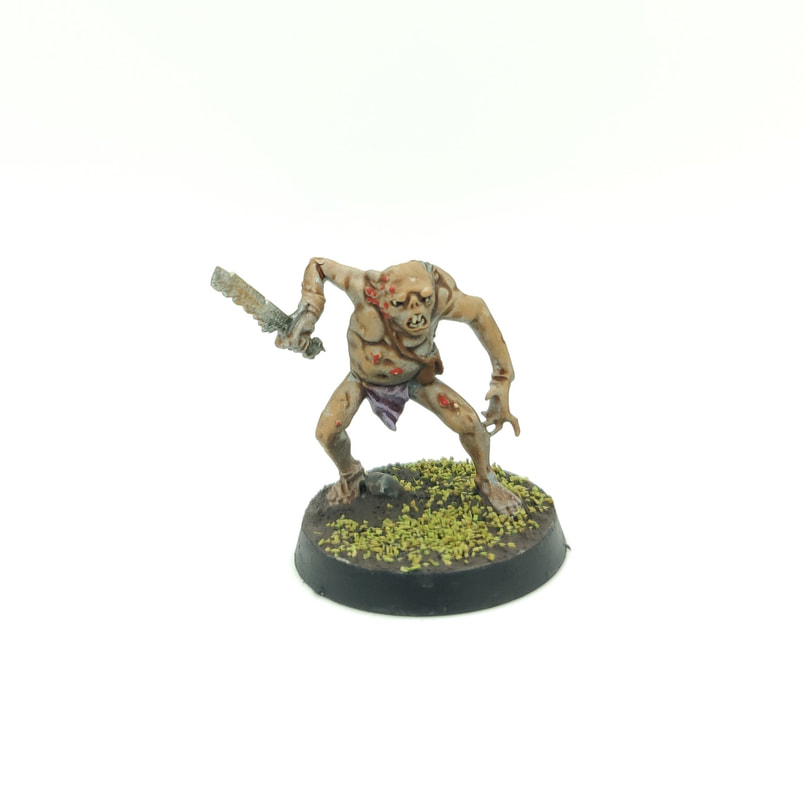
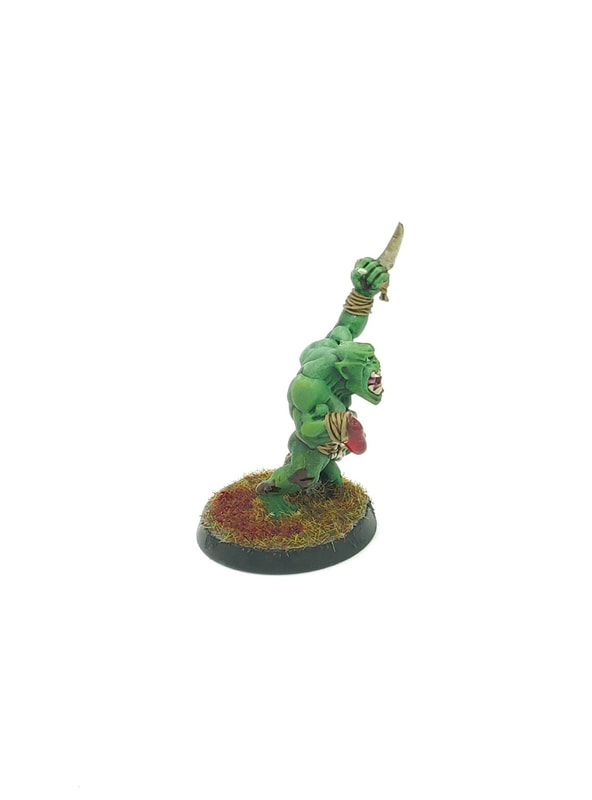
I had used resin for a number of things before (see, for example, the stalagmites above), but I hadn't tried anything quite like I did with this orc. I decided that he had lost his hand in combat, and that blood would be coming from the stump. This is something I'm going to have to keep motivating myself to do, and keep pushing myself forward into new areas. There are many techniques I want to try out and learn, and I don't want the need to paint and post to get in the way of that. The futureI didn't really have a set time frame in mind when I started this, but a month already feels like a good achievement. I'm definitely going to keep going with it for the time being, but will continue to assess whether this is a positive or a negative for me and my painting. I hope to get a slideshow video uploaded in the next week or so, and am already looking forward to creating another one in a month's time! Goblin Squire :)
|
Categories
All
|


 RSS Feed
