|
Hi everyone :)
I thought that today I would talk a little about some of the more unusual tools I use when I am building and painting miniatures. While debate rages about what the best brand of paint is, and who make the best paintbrushes, everyone agrees that both are vital to the mini painting process. I use a few things in my painting which are a little unusual, and I thought I would share those tips with you. This is going to be the start of a series, because I don't want to try and cram so much into a single post that it becomes unmanageable. Some of the things I use I bought because there are cheaper alternatives out there than the specialist miniature stuff, and some I found because there simply weren't tools for miniatures which did what I wanted. Today we're starting in the world of make up. 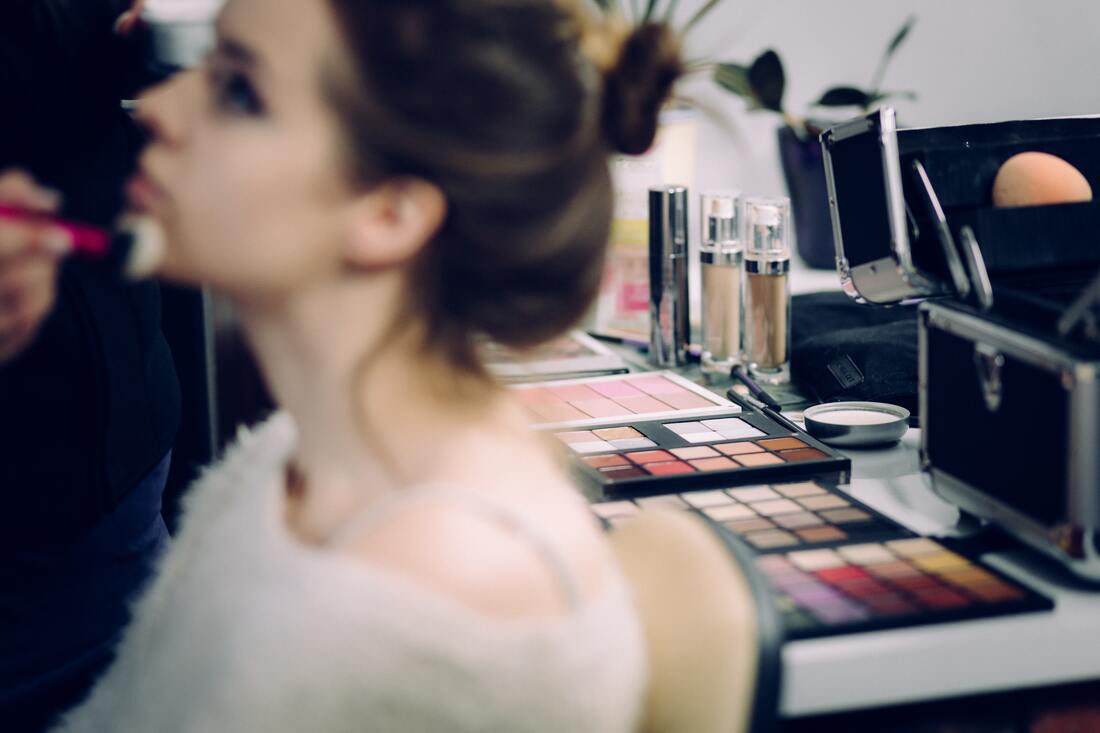
There is actually quite a bit of crossover between the worlds of make up and miniature painting, and I have to thank my wife who is an amazing artist in many media (including make up) for pointing this out to me. You do have to be a little careful, though, because the make up world is prone to high big-brand pricing in the same way miniature painting is.
My first tip here is relatively well known, but I think it's worth repeating anyway. Make up brushes can make very good drybrushes. One of my go-to drybrushes is actually an eyeshadow brush, and they're fundamentally designed with similar properties in mind. The bristles of the brush are densely packed, they have a defined edge and they snap back well. The brush I have cost around £3 (it was actually part of a multi-pack, but is very similar to this brush) and I actually prefer it to my GW drybrush. A wide variety of these brushes exist, and if you're looking for even denser bristles, check out this one. 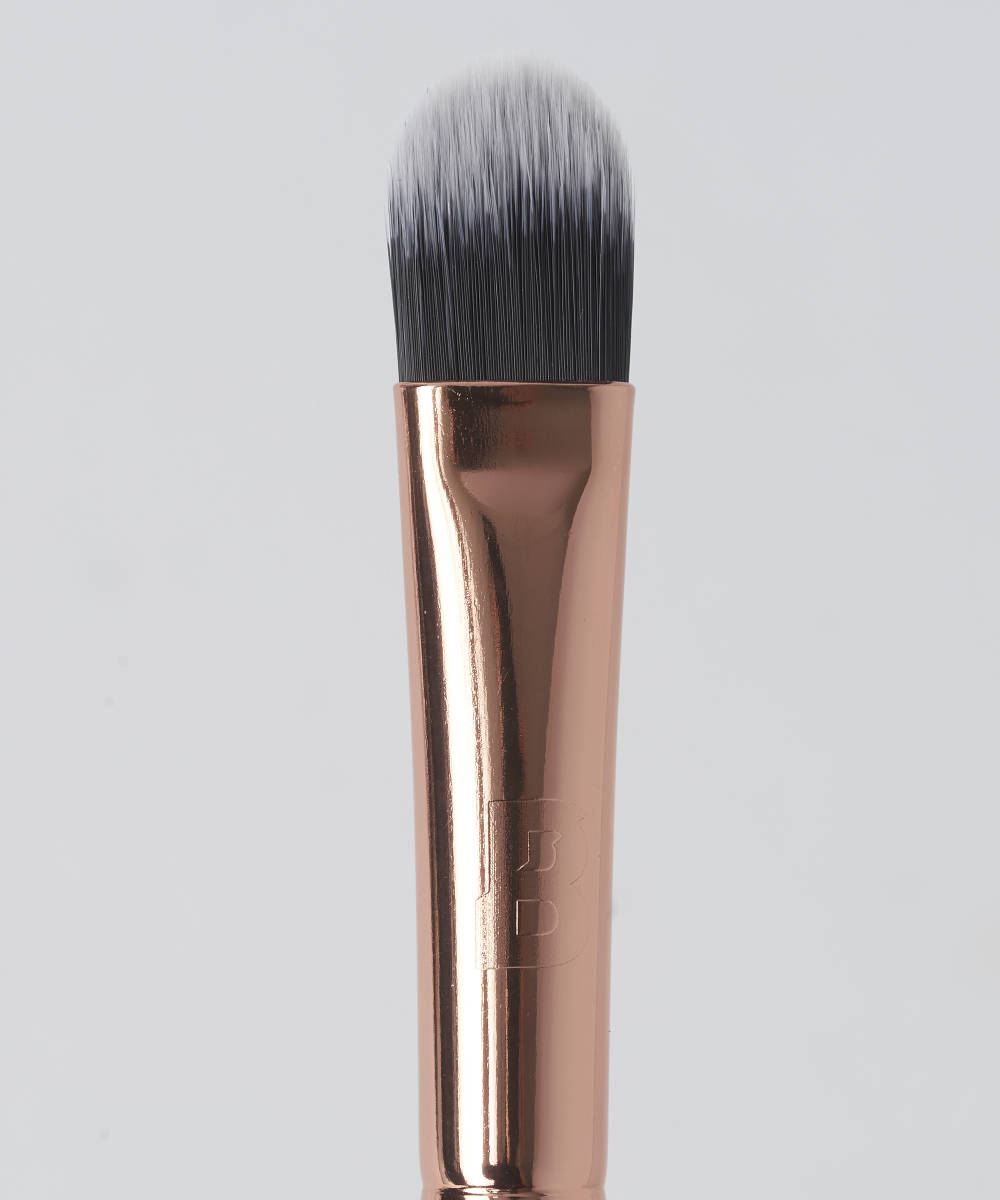
A £3 eyeshadow brush/drybrush
My second tip from the world of make up is one I haven't seen anyone else suggesting, although I'm sure there's someone out there who is! It's to use a silicone liner brush to create accurate circles. This one is a little more expensive (the one I use was £11.99), but I've found it really useful for all sorts of things from polka dots to eyeballs.
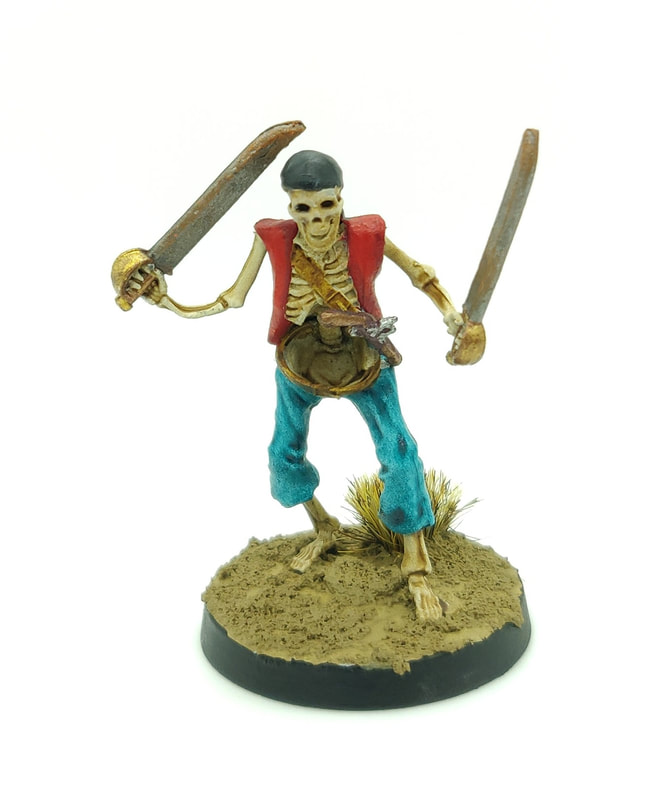
Dots on bandana painted using silicone liner brush
The key with this tool is that it doesn't have bristles like a traditional brush. Instead, it has a single silicone tip which can't splay or divide while you're using it. The tip is a little flexible, so it may take a little practice to get perfect circles, but the nature of the tip makes it significantly easier than using a traditional brush.
As I mentioned, this can be a fantastic tool for painting eyeballs. A quick dab of colour using this tool and you have a great looking eye for your miniature. I hope that you've found this post interesting and informative, I'm planning to post another in this series for each of the next two weeks, so do check back to see what I'm up to! Goblin Squire :)
0 Comments
Hi everyone :)
Following up from my initial unboxing review of Pirates of the Dread Sea last week, I've now had a chance to paint some and wanted to give you a post-paint review! As I mentioned last week, I was sent this miniatures free by Dead Earth Games who produce them, but this is an honest, unbiased review. You can check out the results of my painting in the video above. I painted one mini each day for a week (you can follow my #MiniADay over on my twitter). I'm still learning the videography side of things, so may post an updated video at some point soon, but you can see the miniatures well here.
The Painting Experience
I mentioned in my previous review that I was impressed with the moulding on these, and that held true while I was painting. There were a few mould lines which proved all but impossible to remove without performing surgery on the miniature, but this is often the case with metal miniatures. You can see from the video that these were few and far between.
The level of detail of the sculpts was also impressive. In this blog post I discuss some of the inherent strengths and weaknesses of metal miniatures, and these minis combined that satisfying feel of metal with a good clean sculpt. Metal can sometimes be a little difficult to work with in terms of the adherence of paint, but I didn't have any real problems here. An extra base layer was required compared to working with plastic, but once the paint was layered up the finishes were good and even.
The Miniatures
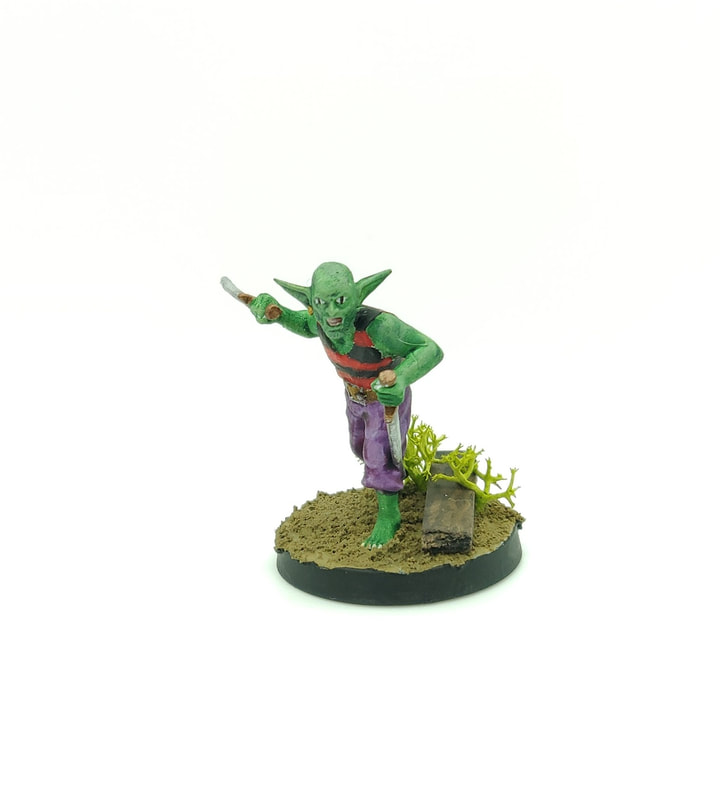
I really like the level of detail on these miniatures - as I mentioned in my unboxing, a middle ground of enough detail to get to grips with, but enough to do a little something different is perfect for me. These have nice, detailed faces, but also left me room for a little freehand. In the incredibly detailed miniatures (think GW) there's little space to add stripes, polka dots and other things I was able to with these miniatures.
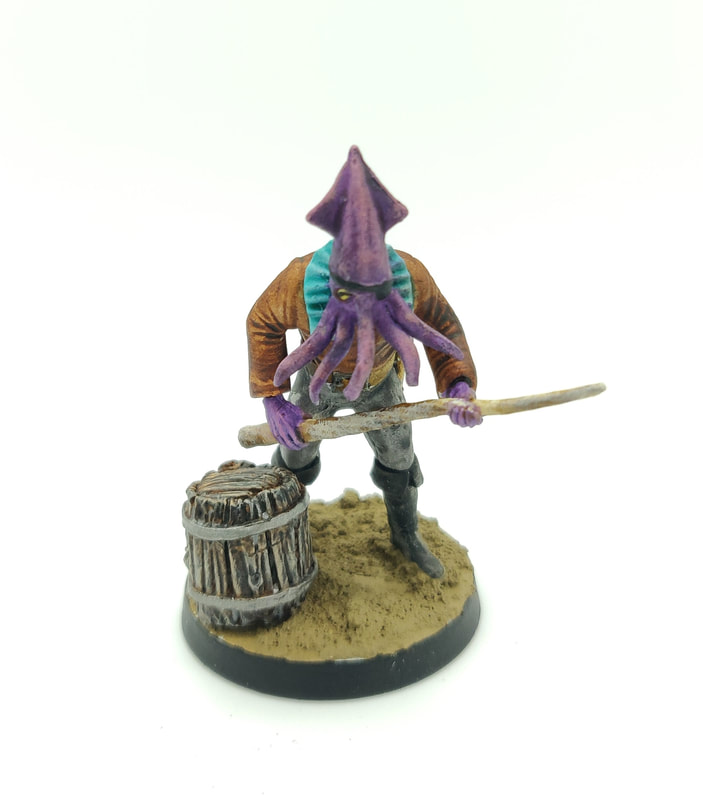
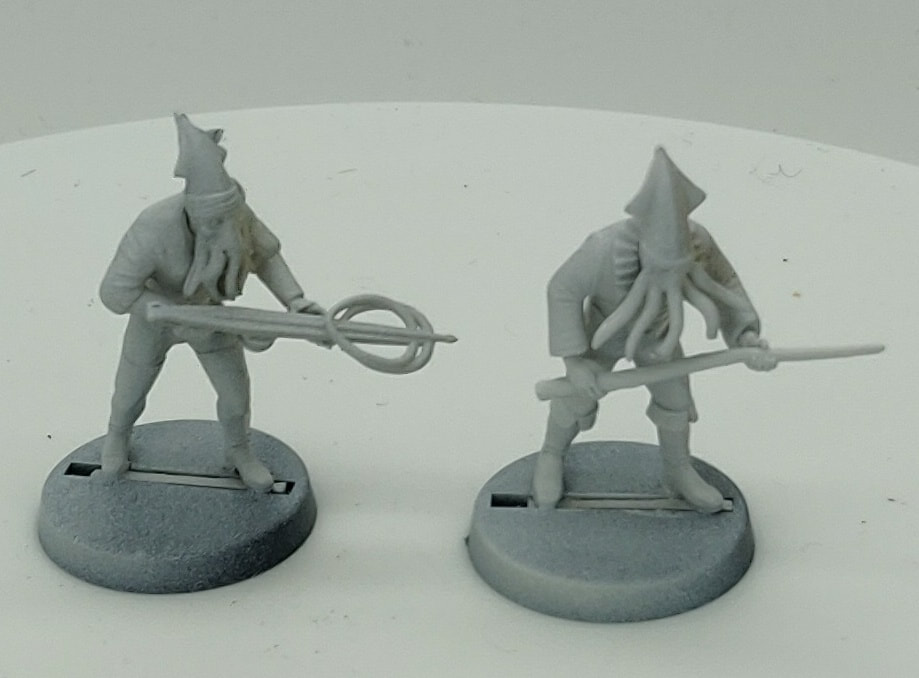
Another thing which stood out to me about these sculpts was an eye for detail. I love that one of the Skrier (the Squid-like pirates) is carrying what appears to be a Narwhal tusk. I liked, also, that there was a diversity sculpted in to these minis which you don't see from many companies. Any miniature can, of course, be painted with any skin tone, but elements like hair style suggest that these were not simply Caucasian sculpts you could paint differently if you were feeling daring. Much as that should be the norm, I think that Dead Earth Games she be praised for that in a market which tends not to. Finally, I want to talk a little about the size of the miniatures. I mentioned in my unboxing that these are 35mm miniatures, and that the standard scale is 28mm or 32mm. As I mentioned then, I think that these could easily fit alongside miniature from companies producing in that scale, but I wanted to offer a size comparison to help you make that decision yourself. This is a picture of the miniatures standing alongside the miniature from Reaper Miniatures commonly called 'Sir Forscale'. 
Where can I find these miniatures?
If you're interested in picking any of these miniatures up for your own collection, head over to deadearth.co.uk. The human and undead crews are currently available on the website, costing £25 per crew, which gets you 5 miniatures. From my experience with these minis I would say that is a very fair deal.
The skrier (squid-like pirates) and orc crews will be available very soon as part of a kickstarter which launches on July 28th 2020. If you head over to https://www.kickstarter.com/projects/chappellm/pirates-of-the-dread-sea-orc-goblin-and-skrier-pirates you can sign up for a notification when the project launches. I'm not sure what the prices are going to be just yet, but I imagine you'll be able to find a bargain or two. I hope that this review has been helpful. If you have any questions or comments feel free to ask them below. Goblin Squire :)
Hi everyone :)
I've had a few questions recently about preparing miniatures for painting, and I thought that over some of my coming blog posts I would look at some of the different elements which are required in the preparation process. With that in mind I decided to break out this video I made a couple of years ago. In the video I look at the different tools I use to remove mould lines, as well as how techniques differ with the different materials miniatures are made from. If you like this video, or my content more generally, I'd suggest subscribing to my YouTube channel because I'm planning to release more videos moving forward.
For ease, if you're interested in any of the tools shown in my video you can follow these amazon links. I can't guarantee anything with them, but they've worked well for me :)
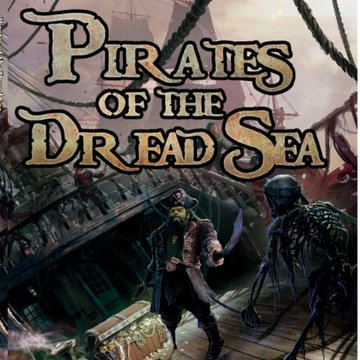 Image Copyright Dead Earth Games. Hi everyone :) I'm excited today to be talking about another small, UK-based miniature company, and some new miniatures. The company is Dead Earth Games, and the miniatures are from a game they make called 'Pirates of the Dread Sea'. Before I go any further, though, I want to say that I was sent these minis free so that I could have a look at them, paint them up and talk about them. There are no limitations on what I can and can't say, though, so these are my honest thoughts. 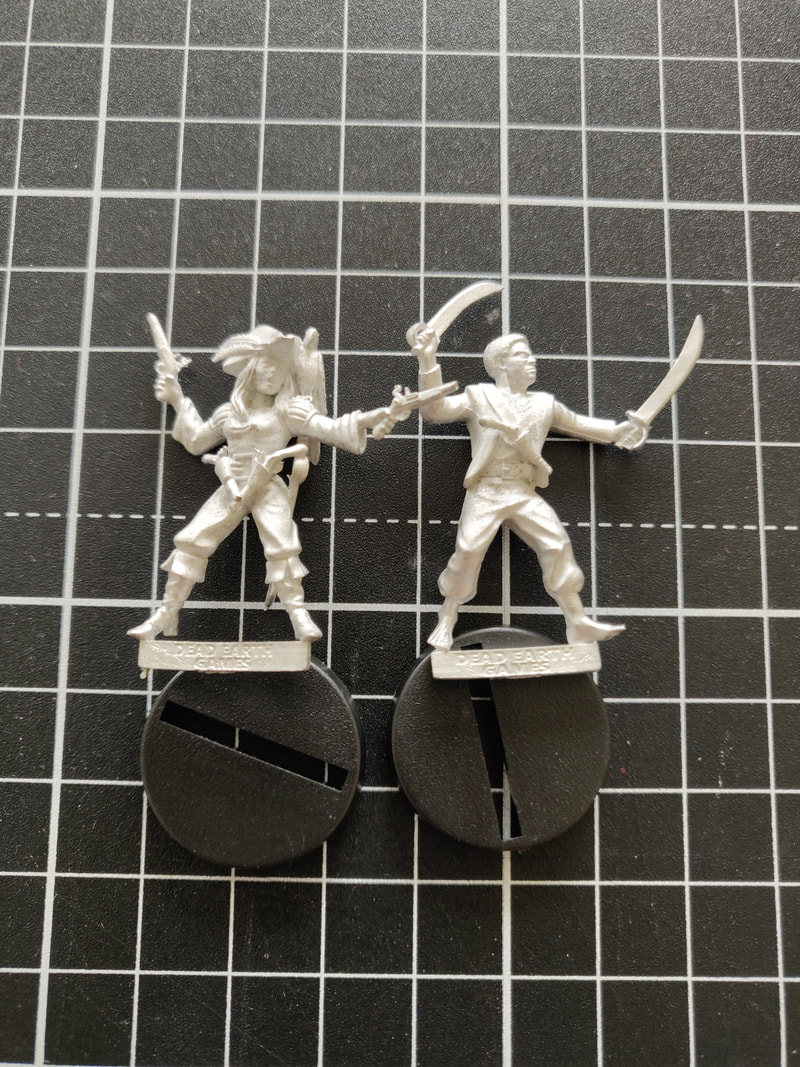 All the unpainted photos in this post were taken immediately after taking the minis out of the box, so I haven't done any clean up on them. No flashing has been removed, and no mould lines have been filed. You'll see as we go through the photos that minimal work is required on the miniatures before they're ready to be painted. I was very impressed with the quality of the casts. The human crew consists of 5 pirates, and costs £25 - here. Another crew I got to have a look at is the Undead crew, which is also 5 pirate for £25 - here. 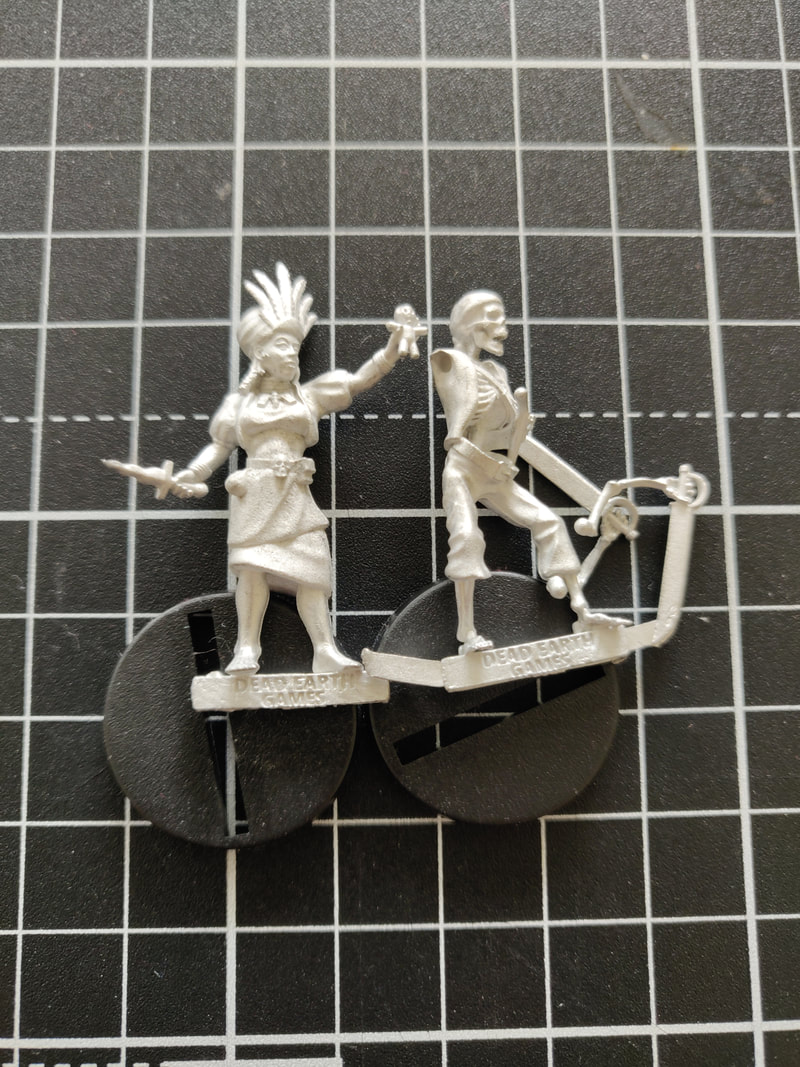 I mentioned in a recent blog post about miniatures having a 'happy medium' level of detail, and that's how I feel about these minis. To put that in other terms, if a miniature has too little detail you have to work incredibly hard to make it look interesting and dynamic; too much detail and you don't have the space to put your own mark on the miniatures - everything is an edge! These minis are in that middle spot where the detail is clear and strong but not overwhelming. This is Keysys, Elf Pirate, available for £4.50 - here. 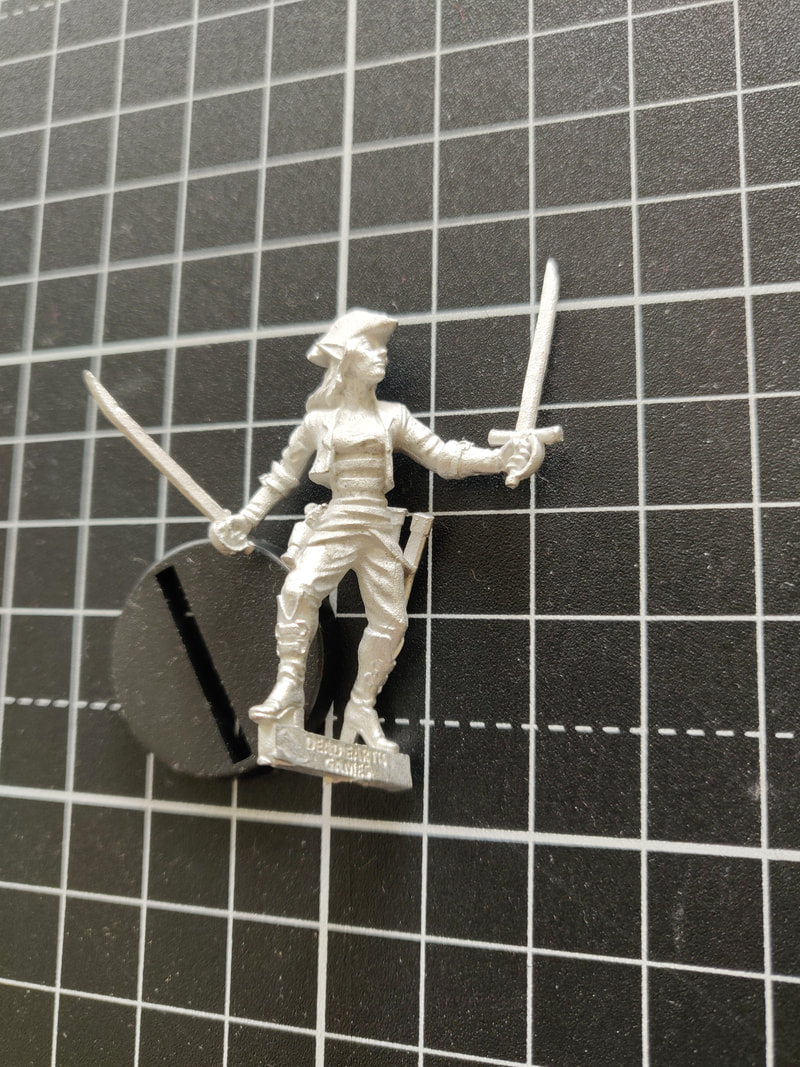 Another area I was impressed, was in gluing these together. Metal miniatures can be a nightmare to build, with hands covered in super glue and long minutes spent holding fiddly pieces together. Most of these minis actually came in one piece, but where glue was required the fit was accurate and snug, significantly reducing build time. Excitingly, I wasn't only given the opportunity to look at miniatures which are currently available. I also got the chance to look at some of the miniatures which will be included in an upcoming kickstarter! These Skrier pirates are some I'm really looking forward to painting and seeing in the kickstarter. It's a little hard to make out the detail in the out-of-the-box photo, so I've included an assembled and primed photo.
Also joining in the upcoming kickstarter are the Orc crew, and as an old-school Orc wargamer myself I think that they're a welcome addition to any fantasy game! 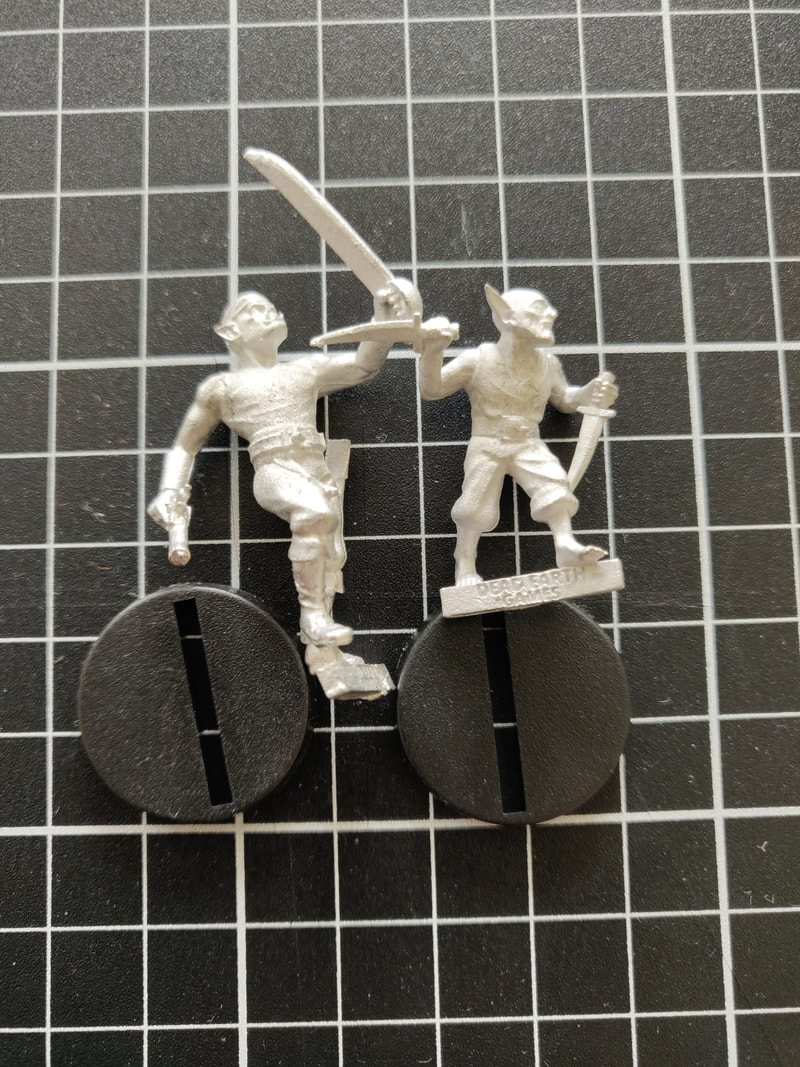 ConclusionAs I mentioned at the start, all of these miniatures are part of the game 'Pirates of the Dread Sea'. I can't give any comment as to the game itself because I haven't played it, but I'll summarise my thoughts on the miniatures (if you're interested in the game, it's a pirate-themed, skirmish, campaign game and you can pick up the rulebook for £25 here). I was impressed by the sculpts and the moulding of these miniatures, they were very easy to build, and were ready to paint very quickly. When I'm painting my mind tends towards the TTRPGs I play, and I think that these would make really good miniatures for pirates in your D&D, pathfinder or other game. One thing to note is that these are 35mm scale, so they are slightly larger than the majority of miniatures out there (the standard is around 28/32mm). That means that these feel slightly larger than your average mini, but only to the extent that they feel like tall humans, elves etc. and not as though they are completely different. This doesn't matter, of course, if you are playing with other Pirates of the Dead Sea but is something to note if using other miniatures. Despite the very slight scale difference, the quality of the minis means that I wouldn't have any concerns about using them in other games. Having got this far with only unpainted minis, here's a little preview of my first paint of these:
If you're interested in adding some pirates to your collection check out the range here. If you want to see what is in store with the kickstarter and other projects, check out @DeadEarthGames on Twitter. Don't forget, as well, to keep an eye on my twitter this week as I paint up these minis :)

Hi everyone :)
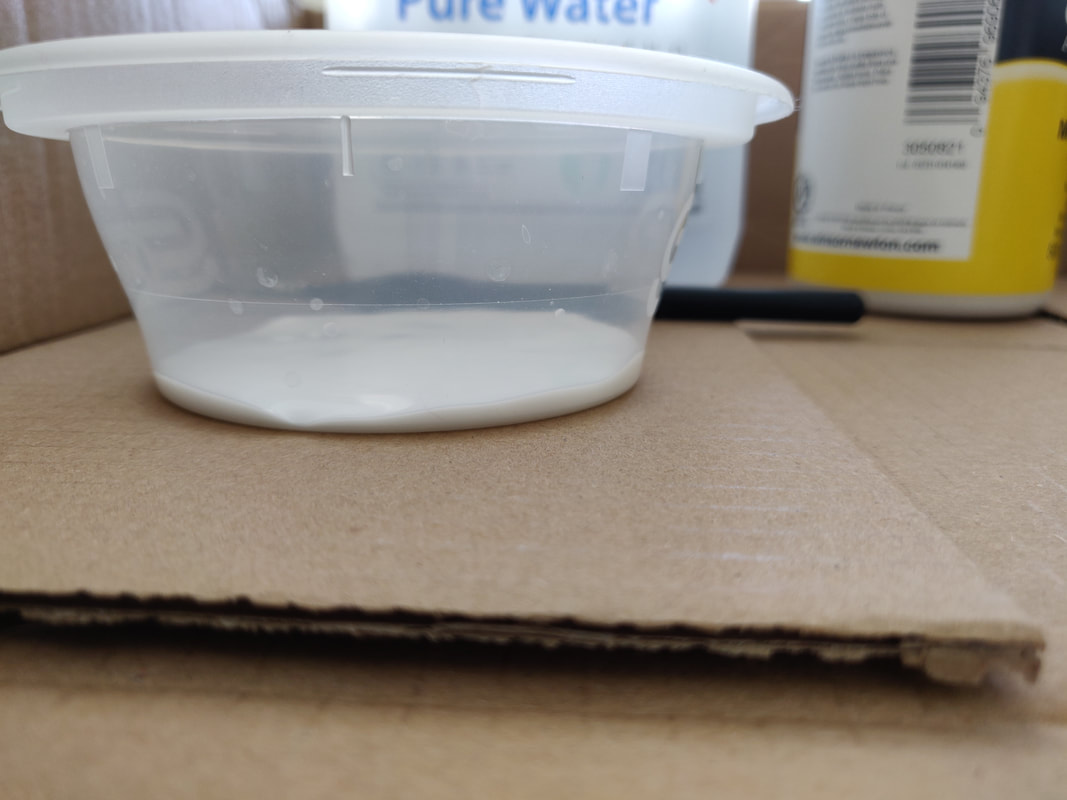
I recently ran out of Agrax Earthshade and found myself critically low on Nuln Oil and, after an appropriate amount of wailing and gnashing of teeth, I decided that rather than replenish my supplies I'd have a go at making replacements myself. Over the last few weeks I've done some research into suggested approaches and conducted some small scale experiments, but this is my first go at making large batch washes. I thought I'd share with you my process and the outcome.

Method
The method for making the washes is actually pretty simple, although it will require a little trial and error to get it perfect. The base for each is 1 part acrylic matt medium to 3 parts distilled/de-ionised water. You're looking for about the consistency of a branded wash, without the colour of course! As I was making a larger batch, I added a single drop of washing up liquid to each pot to act as flow aid. This isn't technically necessary but does help the consistency and how it works on the miniature.
If you're making smaller batches of wash you can put a few drops of washing up liquid into a dropper bottle with some of the distilled water and add to your washes from there. That helps you regulate the amount of washing up liquid because you really do only need a tiny amount.
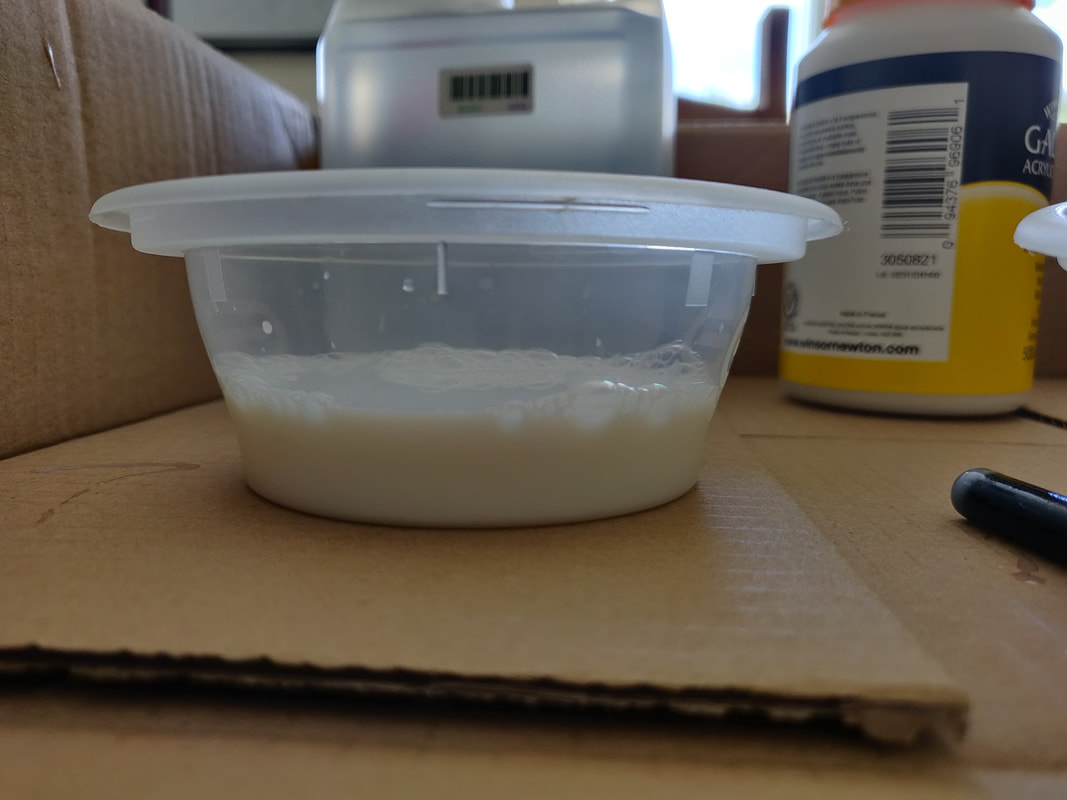
Once you've got the base for the wash it's time to add the colour. Unfortunately this is where trial and error can't really be avoided, as the type of colour (paint or ink) and the level of pigment it contains will affect this. One thing to note is that black ink will essentially always require less colour due to the nature of the pigments.
This is one place I would recommend varying from my method, and a way in which I will do things differently next time. The paints did work as a way of colouring the washes, but were not as good as using inks. The brown in particular, which I picked up because it was cheaper and I intended to use it in large batches, required a lot to be added to produce the colour I wanted and that really started to change the consistency of the wash.

Using this method you do end up with a very slight milkiness to the wash, but it dries clear so it's not something you have to worry about!
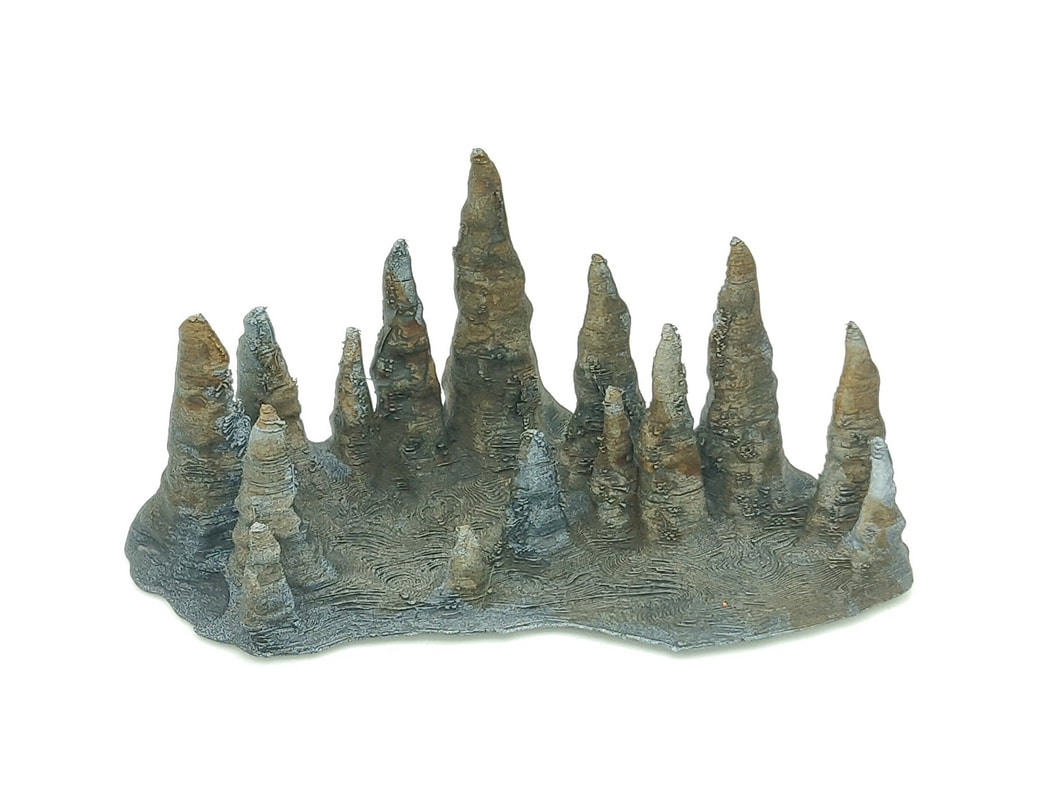
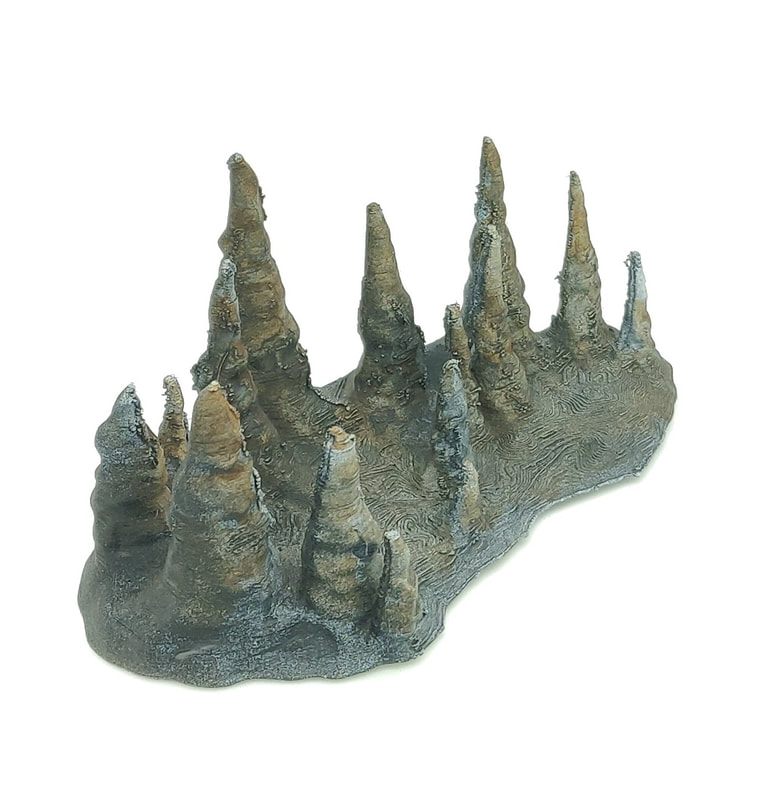
I have found that the best way to test the colour and consistency of the washes is to try them out on a miniature. If you still have some of your preferred branded wash available it's a good idea to try them out next to each other so you can get a clear idea of how similar they are. Don't be afraid to add more of anything at this stage if it's not quite what you were hoping for. I tested my washes on an old 3D print of some stalagmites. Here you can see the piece which I painted using only zenithal priming and the washes I had made.
Final Thoughts
I mentioned above that part of the point of me making these was to save some money. Buying all the ingredients for these isn't necessarily cheap in itself - I spent about £15 - but what I have here will keep me making my own washes for a very long time. In the long run it will definitely prove to be a good investment. I'm also going to be looking in to getting some different inks so that I can make washes of lots of different colours!
I've included some amazon links here (they're actually affiliate links so I would get a tiny amount if you bought something using the links, at no extra cost to you). They're here to make things easier if you want to see what's out there and check out prices. I have no particular attachment to those items other than I've used them and they've worked well. I hope it goes without saying that I don't guarantee anything regarding them! Finally, old takeaway pots work really well for this, but if you use them don't make the mistake of trying to mix the wash by shaking the pot. At least the pots I used were not waterproof and made for a very messy time! I really hope you've found this interesting and helpful, and that you have fun if you decide to make your own washes. Let me know how you get on! Goblin Squire :) 
Image copyright Diehard Miniatures.
Hi everyone :)
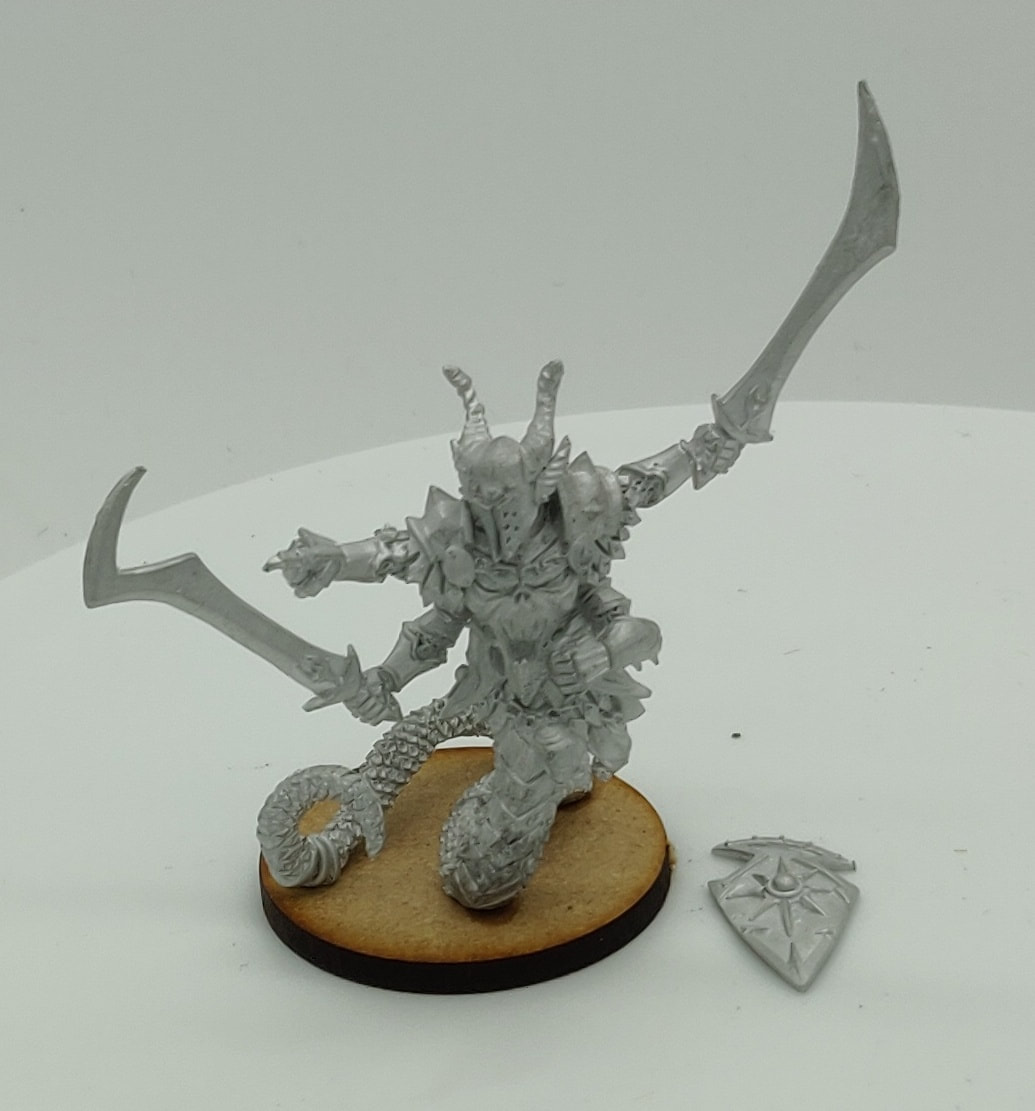
Today I'm going to have a look at another small miniature creator in the UK - Diehard Miniatures. I recently received a mini from a kickstarter they did, and they've recently launched another kickstarter project, so I'll have a look at those. Diehard look to 'bring Oldhammer into the now', and that's reflected in the designs and sculpts. The kickstarter I backed was 'Chaos Incursion', and the miniatures here certainly live up to the idea of recreating old warhammer. This project had a feel of 1990s chaos to me, and I've mentioned before that I like miniatures which combine modern methods and standards with an old-school feel. Unfortunately I was only able to back for a single miniature due to financial constraints, and I chose Helgan Half-Snake, Chaos General. Here's the concept art from the kickstarter page. 
Image copyright Diehard Miniatures
I really loved this concept art, so it is the miniature I was drawn to and ended up backing for. It's always a slight gamble backing a miniature without seeing the sculpt, but I was really pleased with how it was translated into metal.
The miniature which arrived had a fairly heavy covering of flashing (first picture), but it only took about 15 minutes to remove it. Once that was done the miniature was looking really good and I'm looking forward to getting some paint on it (second picture). The miniature itself came in 4 pieces (including the shield which I'll attach after painting). There are some very slight gaps where the pieces attached which I'll fill, although they're small enough that I think you could get away without filling them,
The amount and clarity of the detail is really good, right in that sweet spot of plenty for a dynamic miniature without making it a nightmare to paint! The only thing to note is that he didn't come with a base, so I've used an MDF one I had in my bits box here.
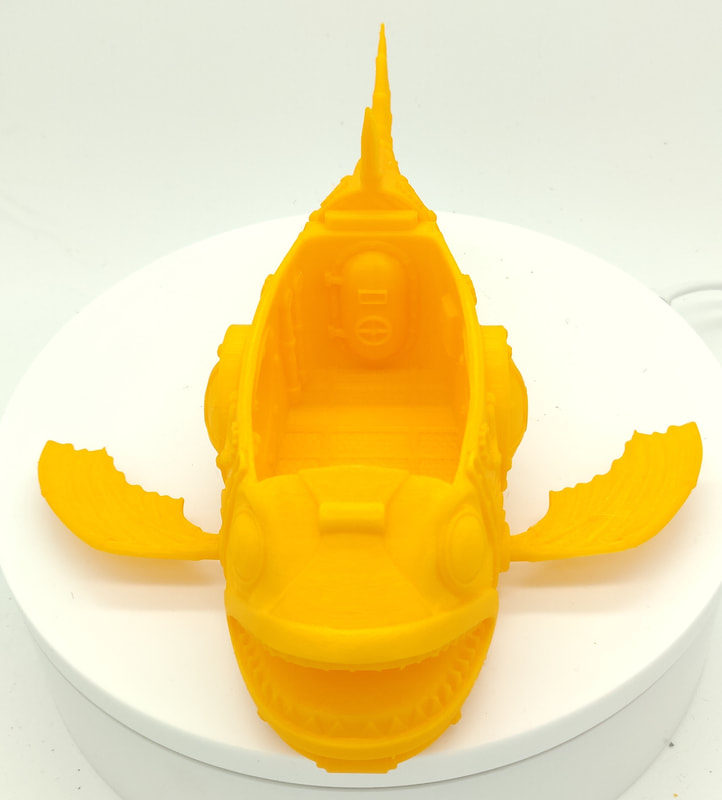
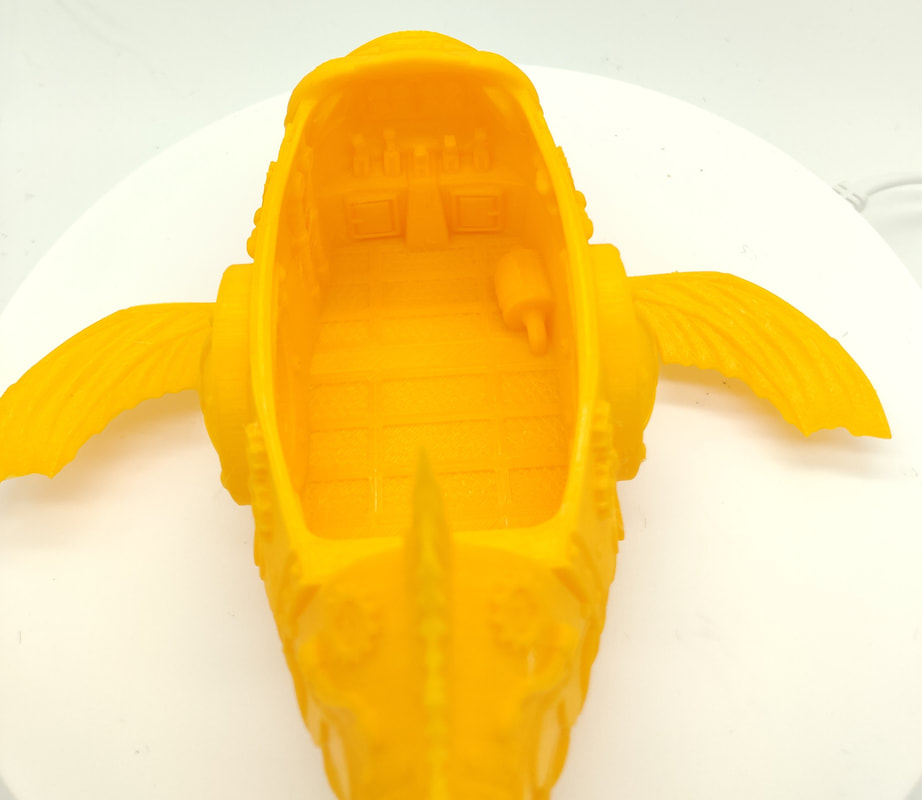
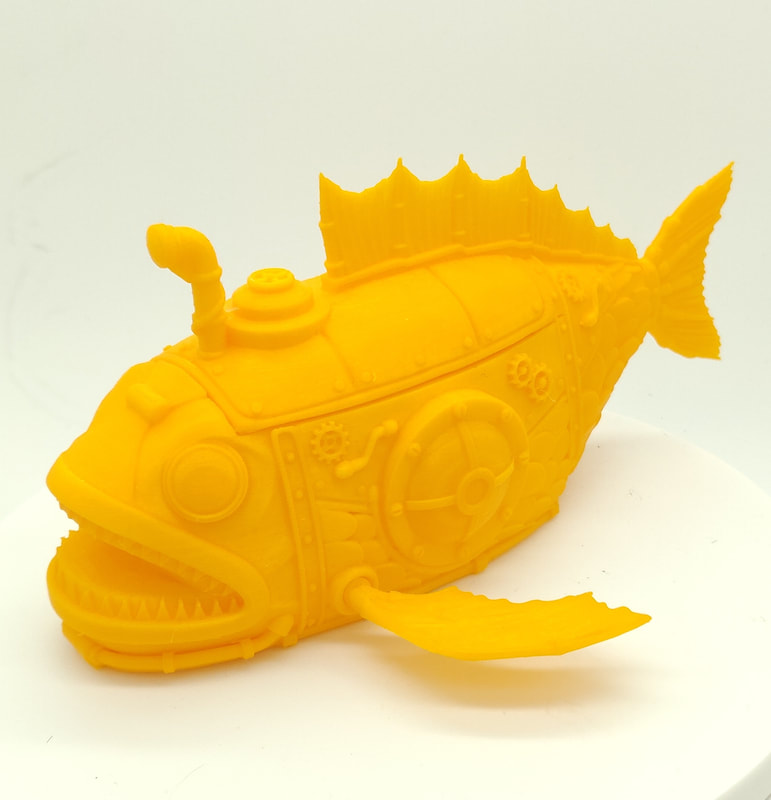
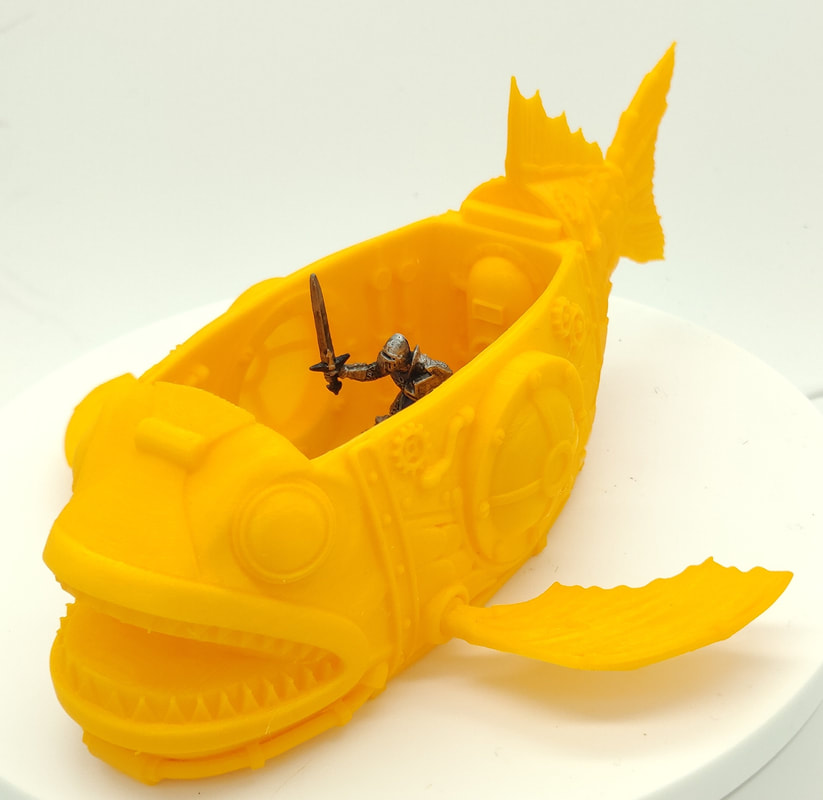
This miniature isn't on the Diehard website just yet (although there are many minis that are), but never fear - there is another kickstarter going on right now! The theme of the current project is 'Wizards and their magics' and there are eight wizards and seven familiars unlocked. There are some really interesting designs on there, from human to arcane creatures, so I'd recommend heading over there and having a look. Pledges start from just £6. https://www.kickstarter.com/projects/diehardminiatures/diehard-miniatures-wizards-and-their-magics Goblin Squire :) Hi everyone :) In my last blog post I wrote about some of the challenges of 3D printing, and the level of perseverance which can be required to get good prints. Today I thought I would show one of my recent prints to show that it’s not all challenges and frustrations! This piece is the Gnomish Submarine designed by EC3D. 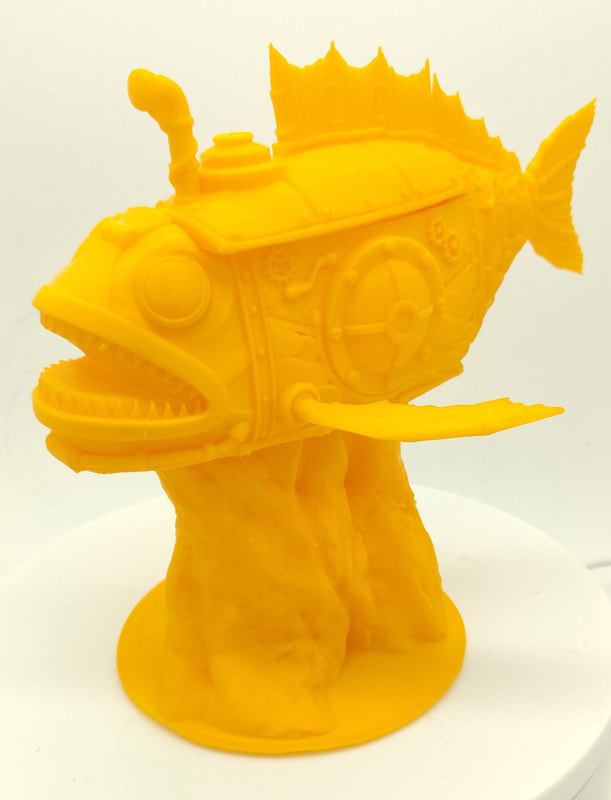 It’s not possible to get good prints with bad printer settings, but a good design is also crucial. As with all forms of art, I guess, good execution can only get you so far, and a perfect print of a bad design will still be lacking. I really like the designs by EC3D - the level of detail both inside and out the submarine is fantastic, and it’s really indicative of the full catalogue of designs. In fact, I like the designs so much I’ve licensed them so that I can sell the prints! If you’re interested in the submarine it is £45 without the base or £65 with the base (unpainted). Printed and painted by me it would be £100 without the base or £150 with (all prices exclude shipping). Remember, you get 10% off all my prices if you support me on patreon for $5+ a month. A large selection of prints can be found on my 3D printing page.
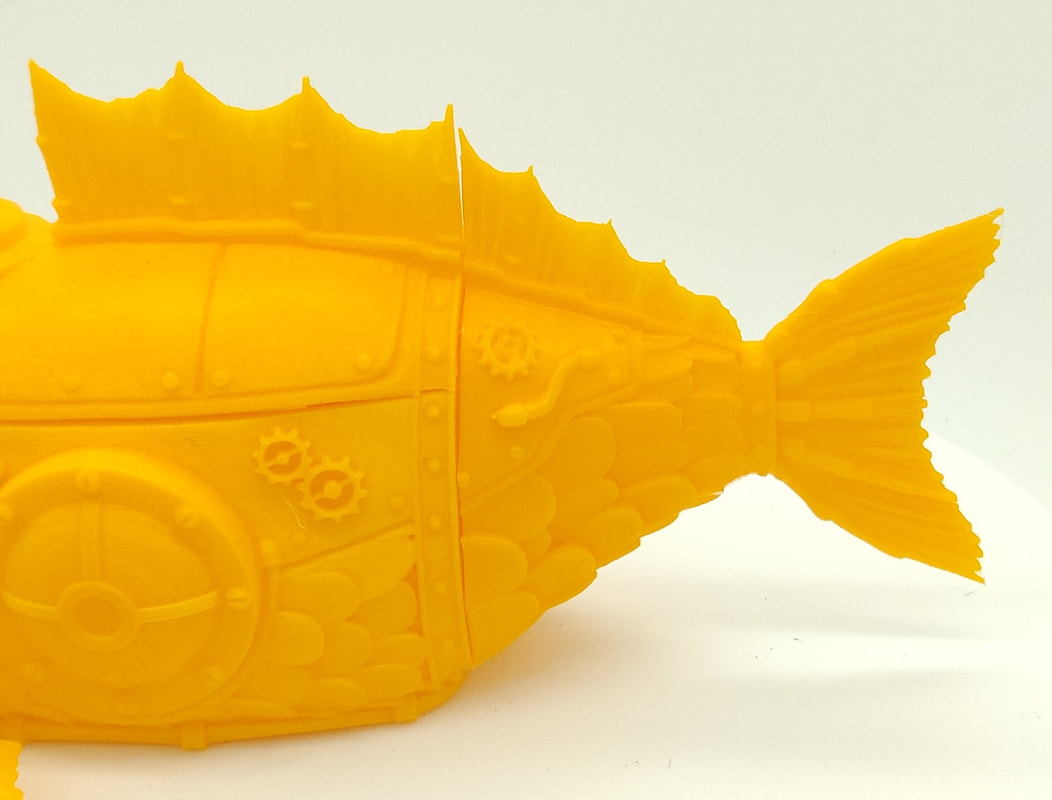 This print hasn’t been cleaned or tidied up at all, and the level of detail you can see is really great. There are one or two areas where there is very slight banding, but realistically that won’t be visible once the submarine is painted. FDM printed pieces like this are a great option for terrain and larger miniatures for the tabletop. I’m now thinking about ways I can gently encourage the players in one of my D&D campaigns to head to the coast so that I can use this beauty!
|
Categories
All
|


 RSS Feed
